Bring Your Own Models / Keys
AI Agents support the Bring Your Own Key (BYOK) capability, enabling customers to integrate their own API keys or preferred model providers. Any provider offering an OpenAI-compatible or Anthropic-compatible API is supported, including public cloud model services as well as self-hosted open-source models.
Benefits of BYOK
-
Flexible cost management: Customers can use their own API keys to control AI usage and associated costs, without relying on Akuity-based billing.
-
Enhanced data privacy and compliance: Organizations with strict privacy or regulatory requirements can route all AI traffic to private or on-premises deployments.
-
Freedom to use the latest models: Customers can access any newly released or alternative models—beyond Akuity’s default catalog—simply by adding their provider keys.
If you use a custom model instead of an Akuity-provided model, the model's performance and capabilities may not be optimal.
Supported Model Providers
AI Agents currently support the following providers:
- OpenAI
- Anthropic
- OpenRouter
- Bedrock
- Gemini - Google AI Studio
- Any self-hosted model exposing an OpenAI-compatible or Anthropic-compatible API
Setup
Getting Started with BYOK
To start using the BYOK (Bring Your Own Key) feature:
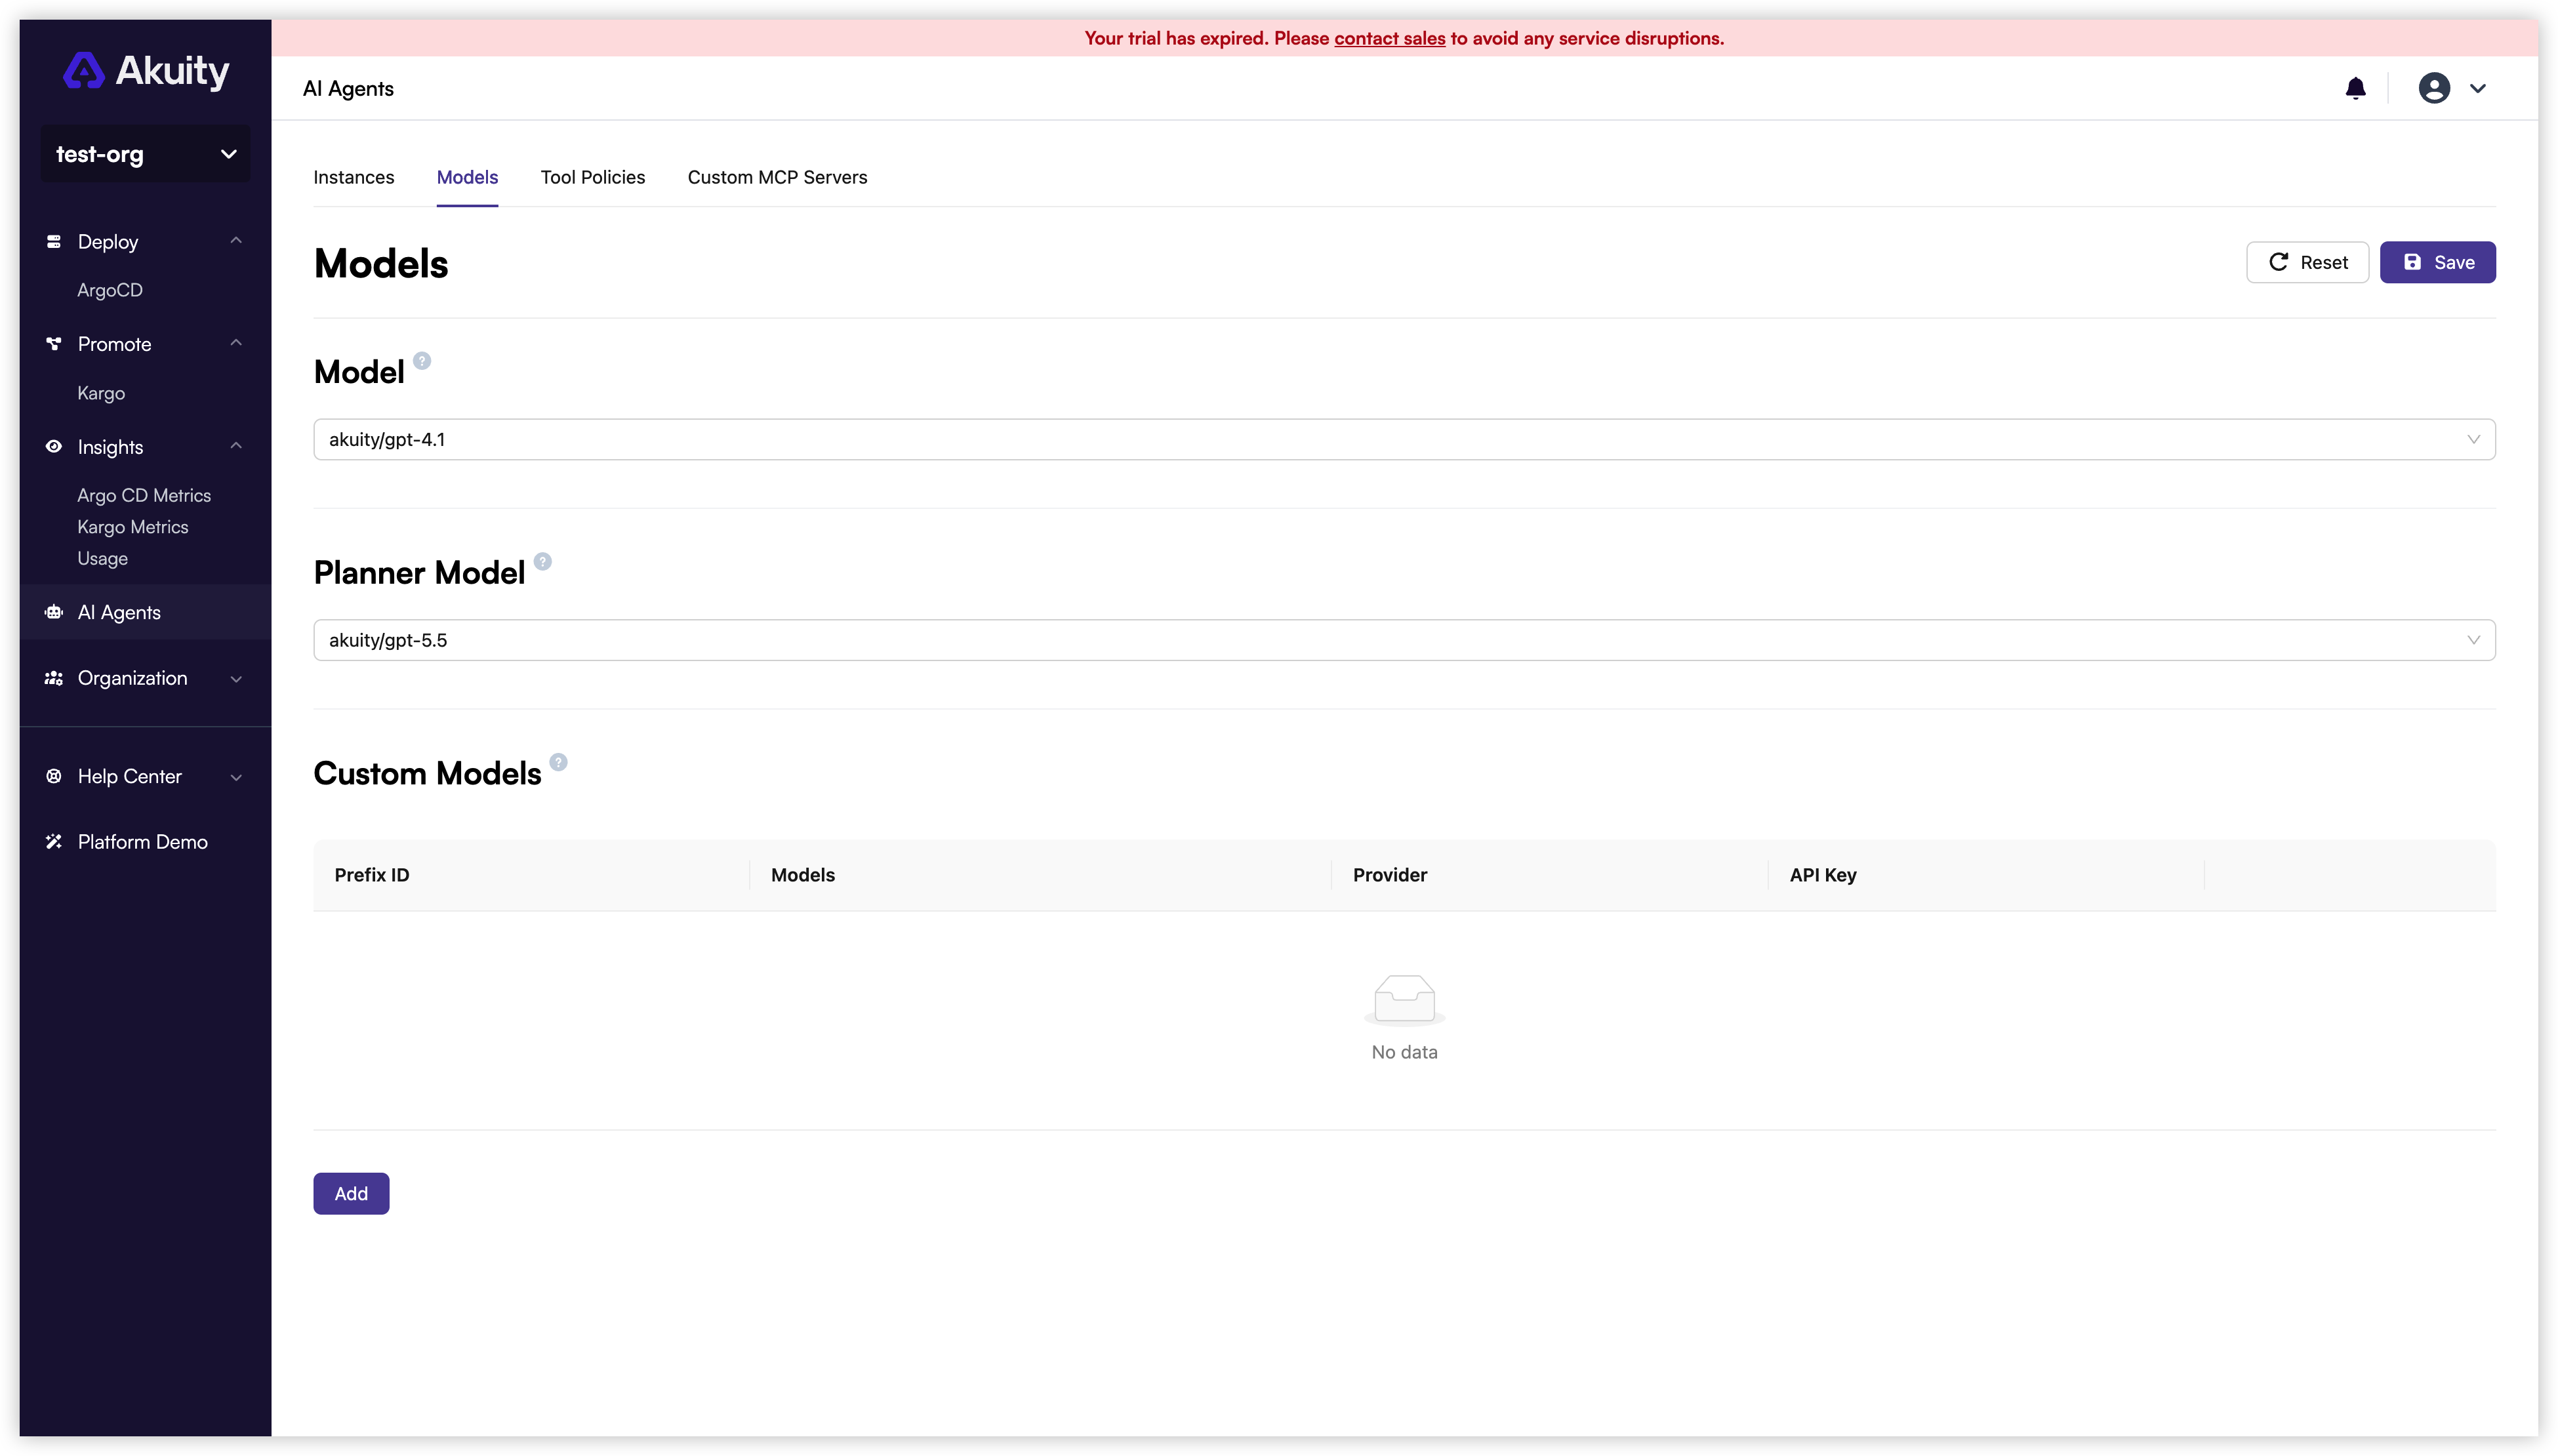
- In the Akuity Portal, navigate to AI Agents → Models and click Add.
- Select your Provider. For a self-hosted model with an OpenAI-compatible or Anthropic-compatible API, choose the corresponding OpenAI or Anthropic provider.
- The Prefix ID helps distinguish models with the same name from different providers (for example, both OpenAI and OpenRouter may offer a model named GPT-5.1).
- If you are using a self-hosted model, change the API Base URL to your model endpoint.
- Select models from the model dropdown list. By default, only the latest GPT and Claude series models are listed. If the model you want is not in the list, you can manually enter the model ID.
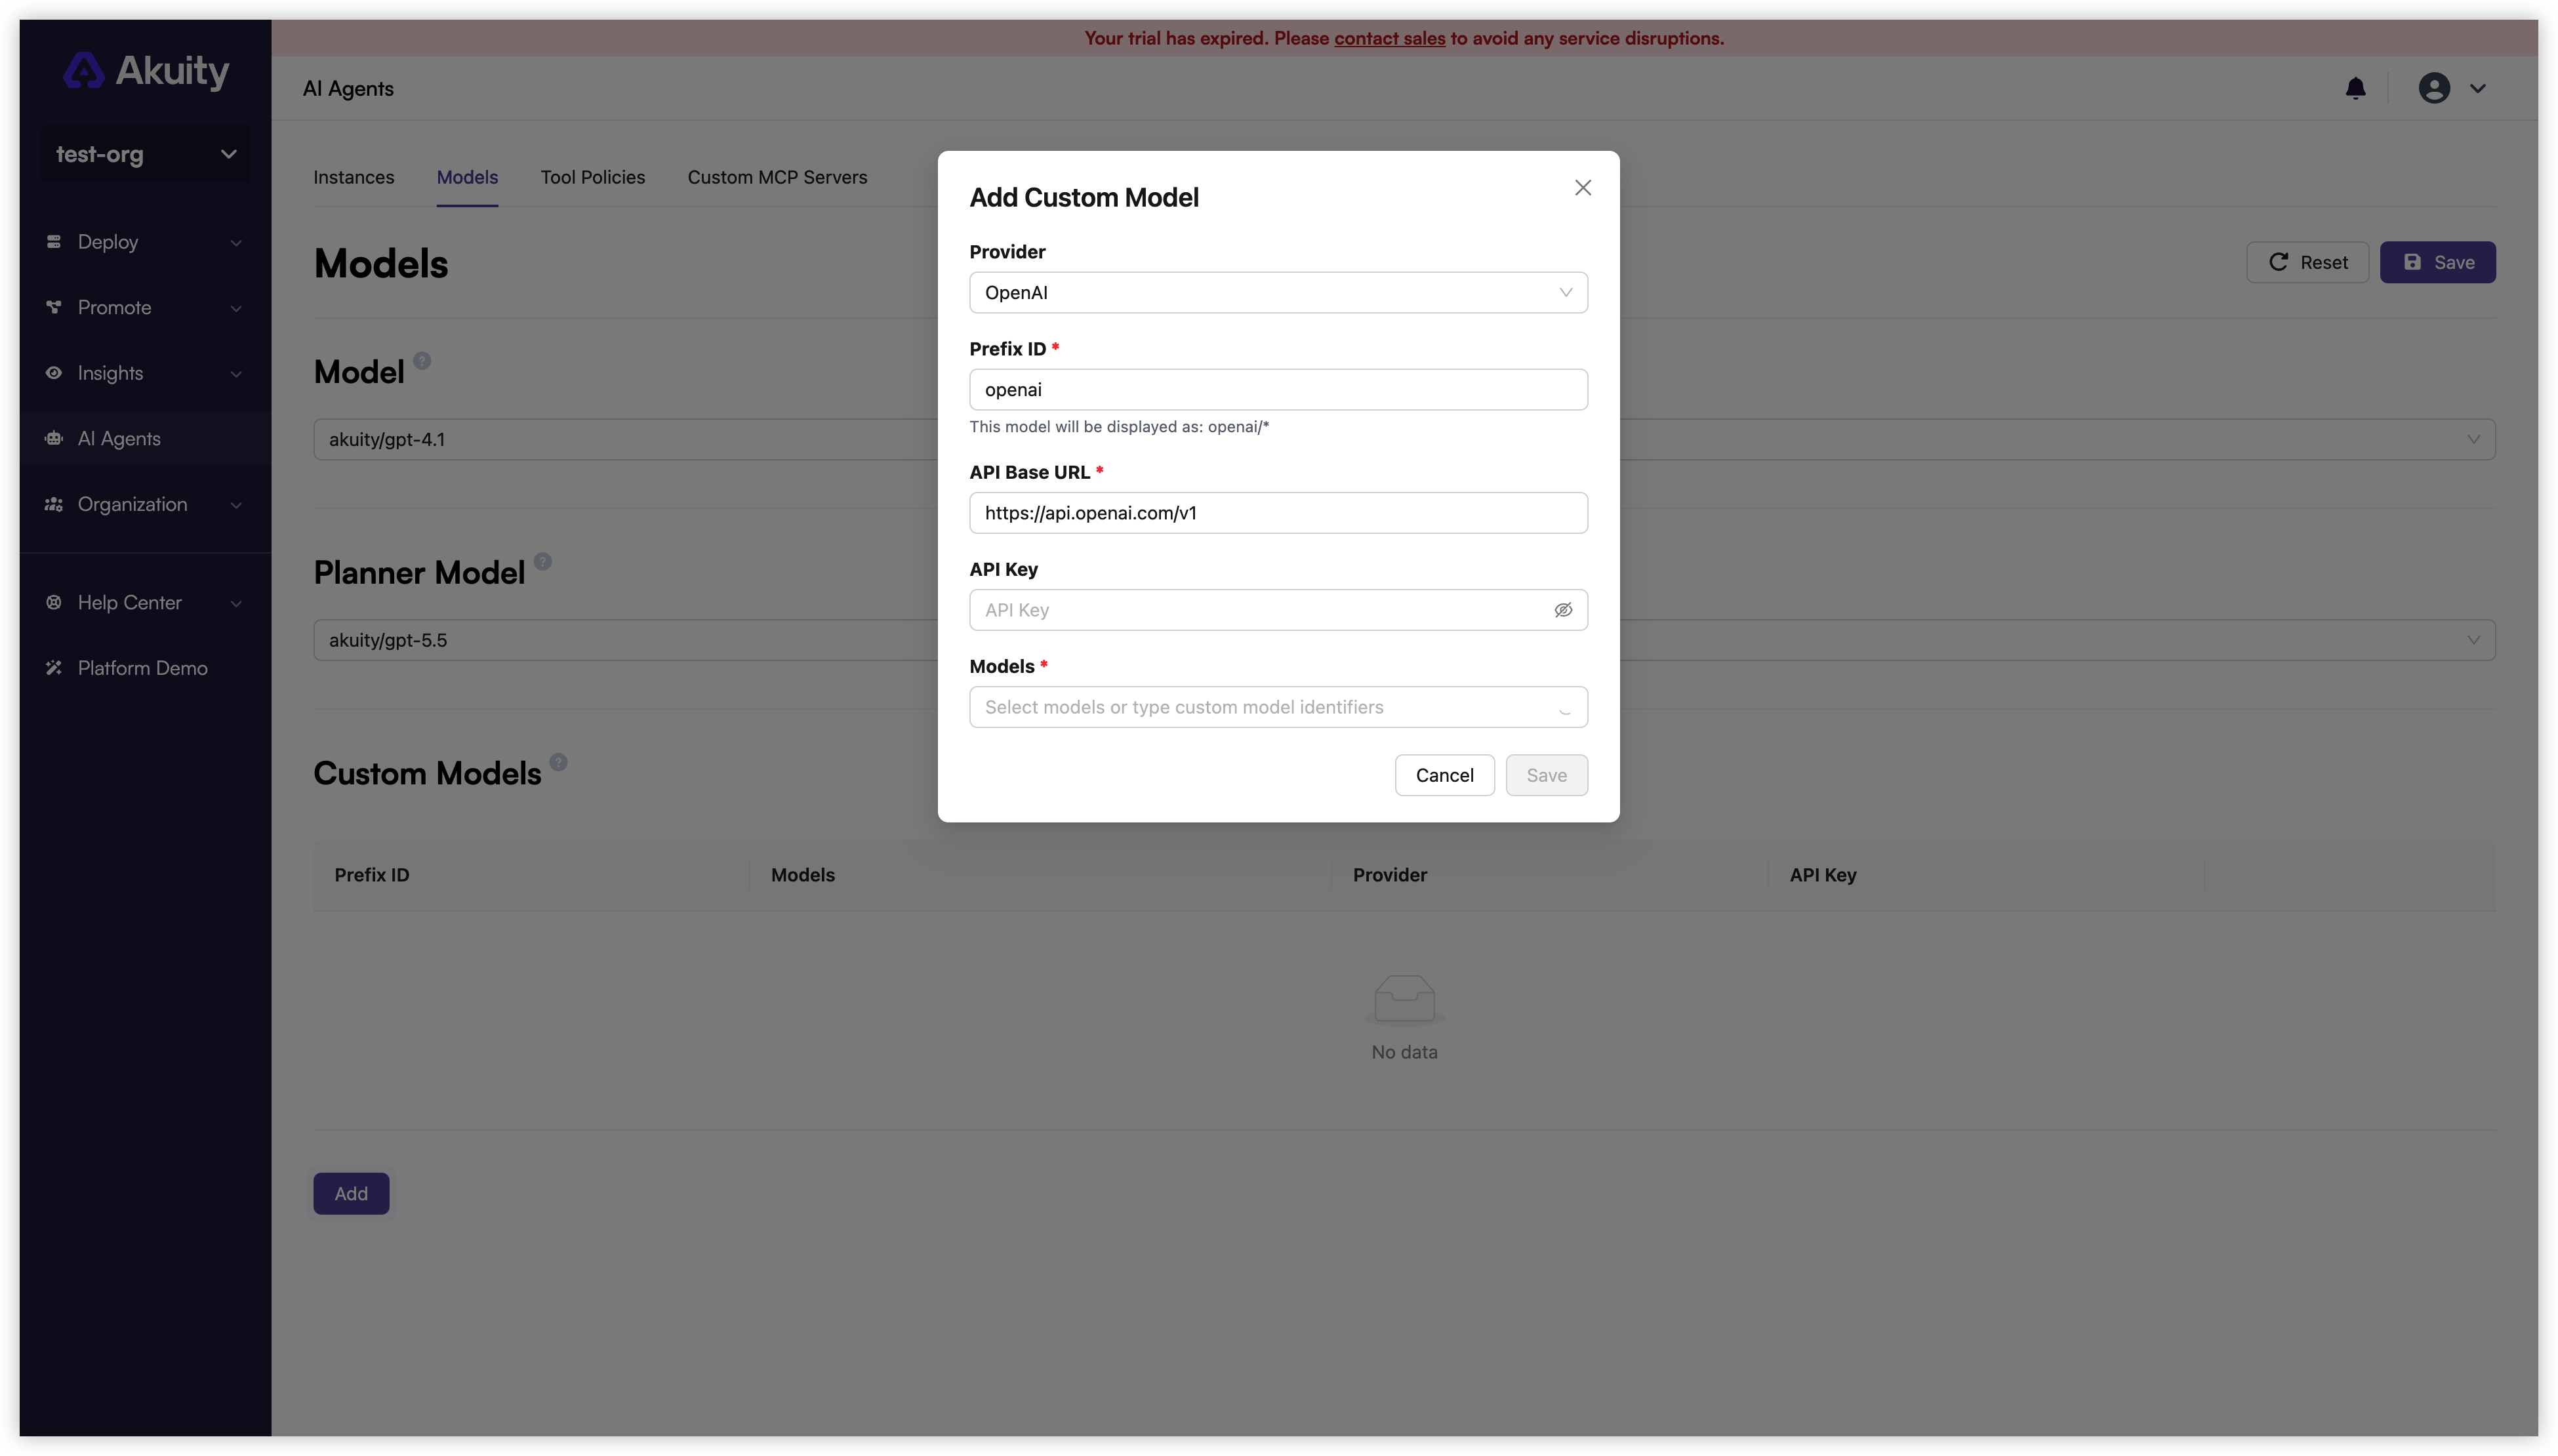
Click Save in the custom model dialog. Select your newly configured model in the Model dropdown. The Planner Model plans multi-step tasks and is selected separately; choose a custom model there as well if you want planning to use your own provider. Click Save at the top of the Models page to apply the configuration.