Creating Addons
Cluster addons can be created in two ways:
- Marketplace wizard
- Manually creating the repository
Before creating cluster addons, ensure that you have installed the addons extension and connected the addons Git repository.
Step 1: Install Addons Extension
To use the cluster addons you must install cluster addons extension on your Argo CD instance. To do so:
-
Navigate to your Argo CD instance settings and enter Extensions section.
-
Click the Install button on Cluster Addons tile. You will see a modal, where you can add users and group roles that have access to the addons extension inside Argo CD.
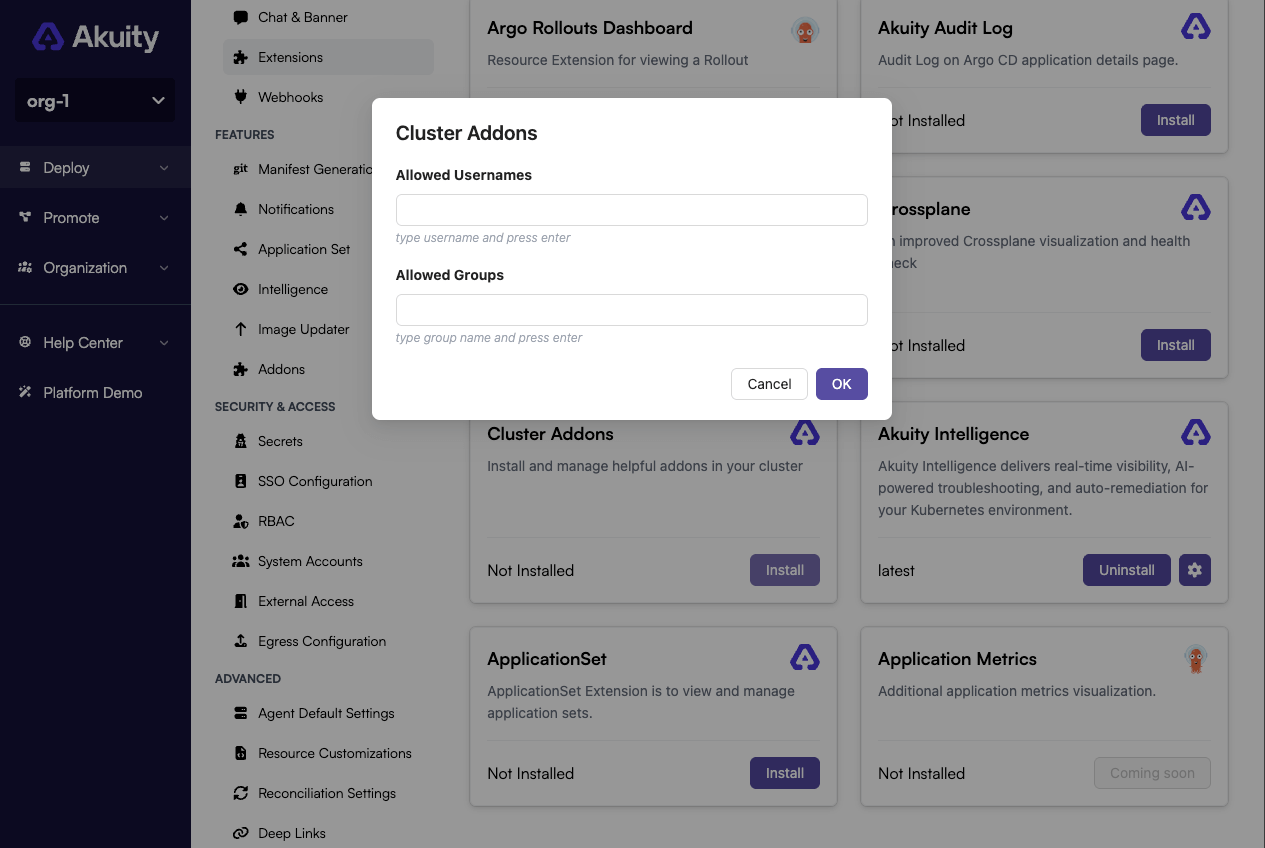
- After configuring and clicking OK button the extension will be installed.
Step 2: Add Addons Repository
The addons repository contains the addons for the cluster. There are two ways to add an addons repository:
Option 1: Connect Existing Addons Repo
If you already have a repository added to Argo CD that you want to use for cluster addons:
-
Go to your ArgoCD instance settings on Akuity Platform and enter Addons section. You can also access this page from the addons list in ArgoCD extension.
-
Click the Connect Addons Repo button.
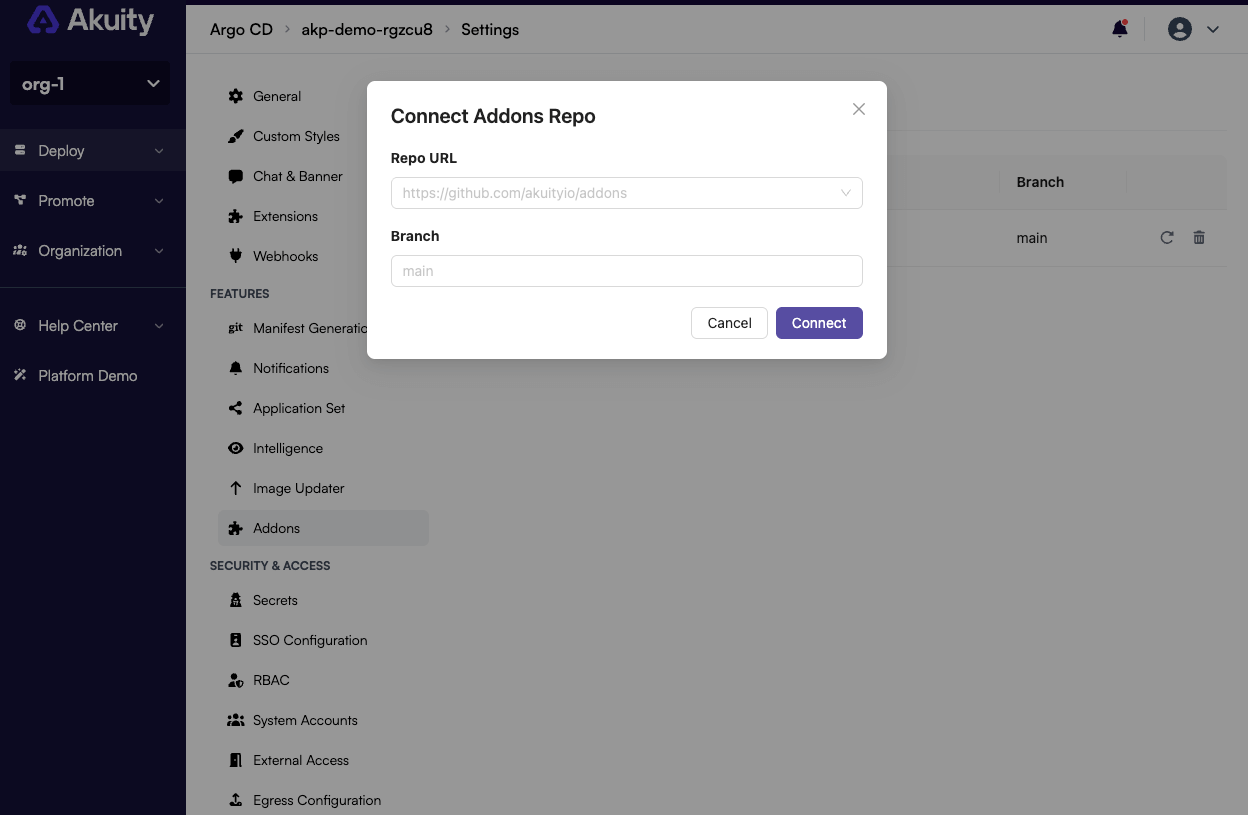
-
In the modal that opens, select the repository from the list of existing Argo CD repositories and enter the branch, then click Connect.
importantThe repository credentials must have write access to the repository for features like marketplace operations, manifest source updates, and deletions to work properly.
Option 2: Add New Addons Repo
If you want to create a new repository from scratch:
-
Go to your ArgoCD instance settings on Akuity Platform and enter Addons section. You can also access this page from the addons list in ArgoCD extension.
-
Click the Add Addons Repo button.
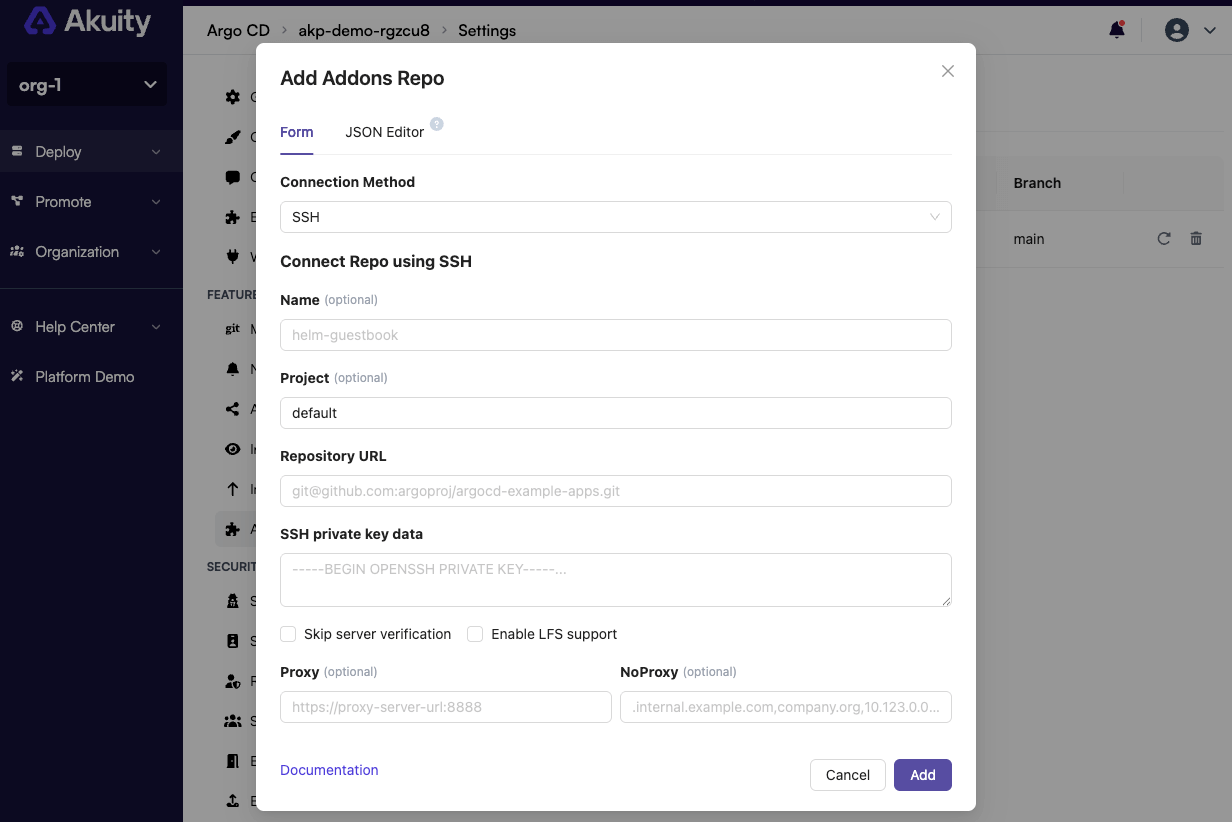
-
In the modal that opens, you'll see two tabs:
- Form: Use the form interface to configure the repository
- JSON Editor: Use JSON format for advanced configuration
-
In the Form tab, configure the repository connection:
- Connection Method: Select your preferred connection method from the dropdown (e.g., HTTPS, SSH, etc.)
- Repository URL: Enter the Git repository URL
- Credentials: Provide authentication details based on your connection method:
- For HTTPS: Username and password/token
- For SSH: SSH private key
- Additional Settings: Configure any other required parameters specific to your repository
-
Click Add to create the repository. The corresponding repository will be automatically added to Argo CD and connected as a cluster addon repository.
Step 3: Create Addons
Once the addons repository is connected, you can create cluster addons using the marketplace wizard or manually.
Marketplace
The Cluster Addons Marketplace is a curated catalog of ready-to-deploy applications for Kubernetes clusters. With just a few clicks, users can deploy multiple addons to all their configured clusters with no complex setup required. From monitoring to security and developer tools, the marketplace streamlines deployments and boosts efficiency.
To create a cluster addon using the marketplace wizard, follow these steps:
-
Ensure that the Cluster Addons Extension is installed and addons repository is connected.
-
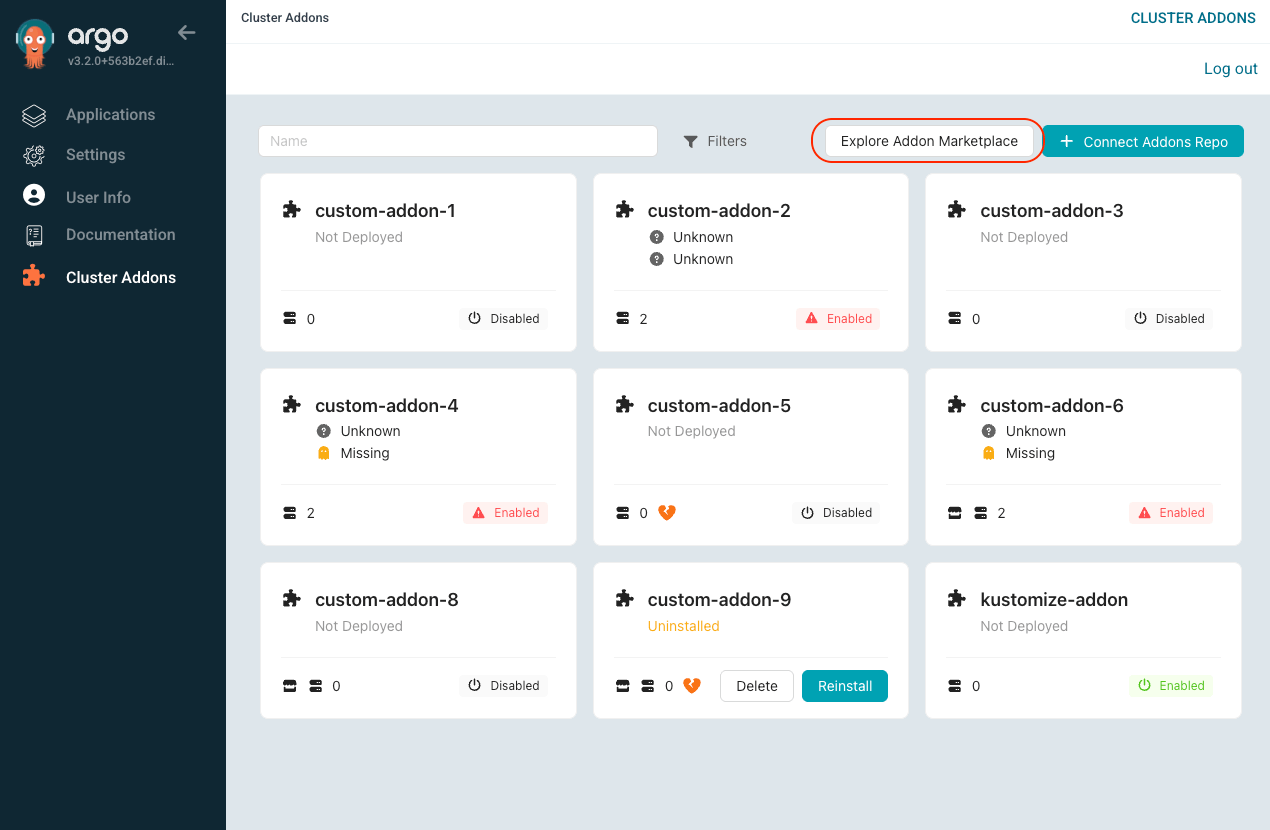
Go to your deployed Argo CD instance and enter Cluster Addons section.
-
Click Explore Addon Marketplace button.
-
View the list of available addons. Choose the addon you wish to add, click the Add button, and then click Next.
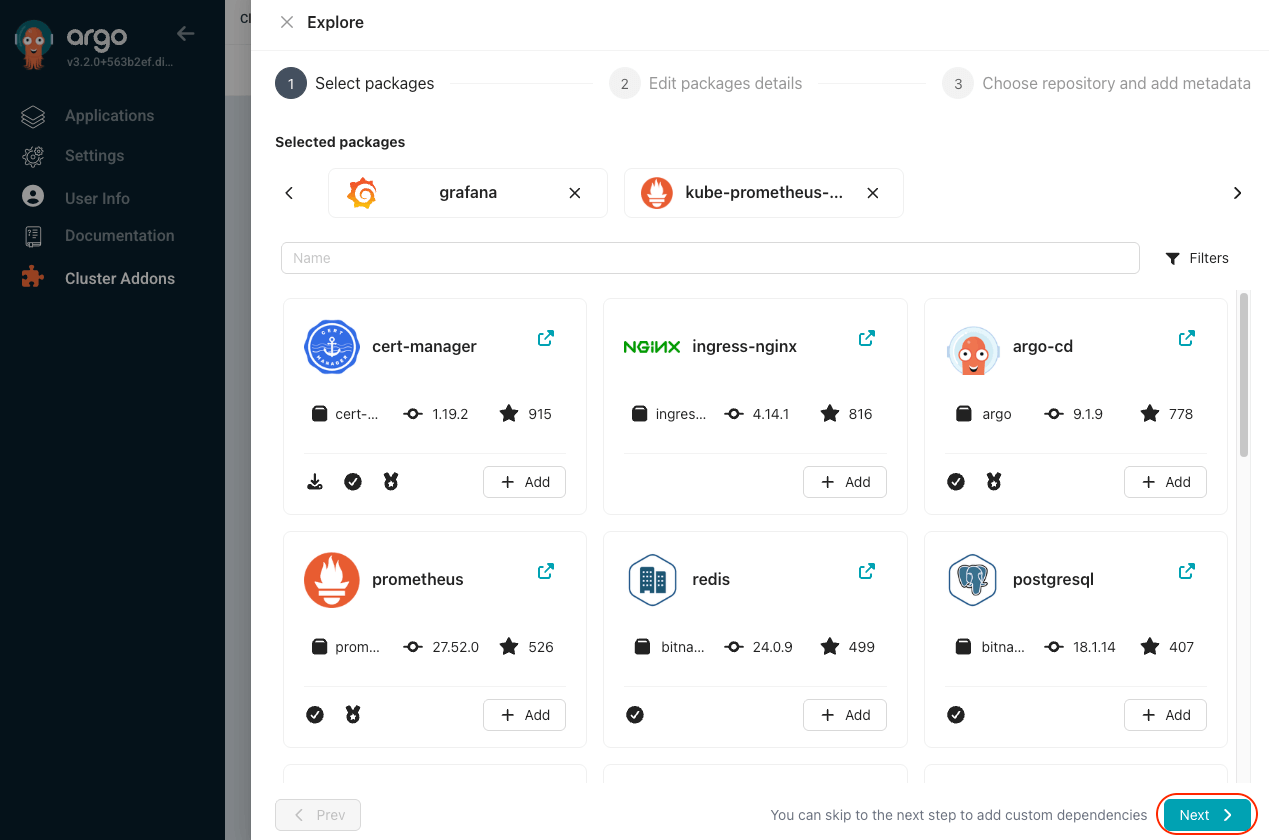
-
In the Edit packages details step, review the marketplace dependencies that have been added:
- Marketplace dependencies: Change the version of the added dependencies.
- Custom dependencies: Add custom dependencies if required (provide Name, Version, and Repository URL).
Click Next.
-
In the Choose repository and add metadata step, provide:
- Repository: Choose the Git repository and branch where you want to add the addon.
- Helm chart metadata: Enter the Name, Version, and Description.
- Additional overrides: Add any overrides if needed (for example, cluster or environment overrides).
Click Finish.
-
The addon is created in the selected repository.

Reinstalling Marketplace Addons
If an addon is deleted from the Git repository, you can reinstall it to update the addon in the cluster. You can also delete marketplace addons directly from the platform interface.
When deleting a marketplace addon from the platform, the action will delete the addon marketplace installation data (which can be used for addon reinstallation) and also delete Git repository data related to this addon name.
Follow these steps:
-
Go to the Addons tab in your ArgoCD instance and look for the addon you wish to reinstall. These addons will be marked with a Uninstalled status.
-
Find the addon you wish to reinstall and click the Reinstall button.
-
You will see a confirmation modal that allows to also change the version of reinstalled dependencies. Click Reinstall again to confirm.

Manually Creating Addons
Cluster Addons supports two types of manifest generation tools: Helm charts and Kustomize overlays. Choose the option that best suits your deployment requirements.
To manually create cluster addons, follow these steps:
-
Ensure that the addons repository is connected.
-
Organize your repository with the following directory structure:
<addons-repo>
├── addons
│   ├── <helm-addon-name>
│   │   ├── Chart.yaml
│   │   ├── values.yaml
│   ├── <kustomize-addon-name>
│   │   ├── kustomization.yaml
│   │   ├── <resource1>.yaml
│   │   ├── <resource2>.yaml
├── clusters
│   ├── <cluster-name>
│   │   ├── <helm-addon-name>
│   │   │   ├── values.yaml
│   │   ├── <kustomize-addon-name>
│   │   │   ├── kustomization.yaml
├── envs
│   ├── <env-name>
│   │   ├── <helm-addon-name>
│   │   │   ├── values.yaml
│   │   ├── <kustomize-addon-name>
│ │ │ ├── kustomization.yaml -
Once the repository is configured with the required addons, they will be available in the Cluster Addons section of your deployed ArgoCD instance.
In the next section, we will see how to install the addons in the cluster.