Deploying Addons
Once you have created the addons, you can enable (deploy) them in your cluster. Before deploying, you must first configure the addon.
Step 1: Configure Addon
To configure an addon, follow these steps:
-
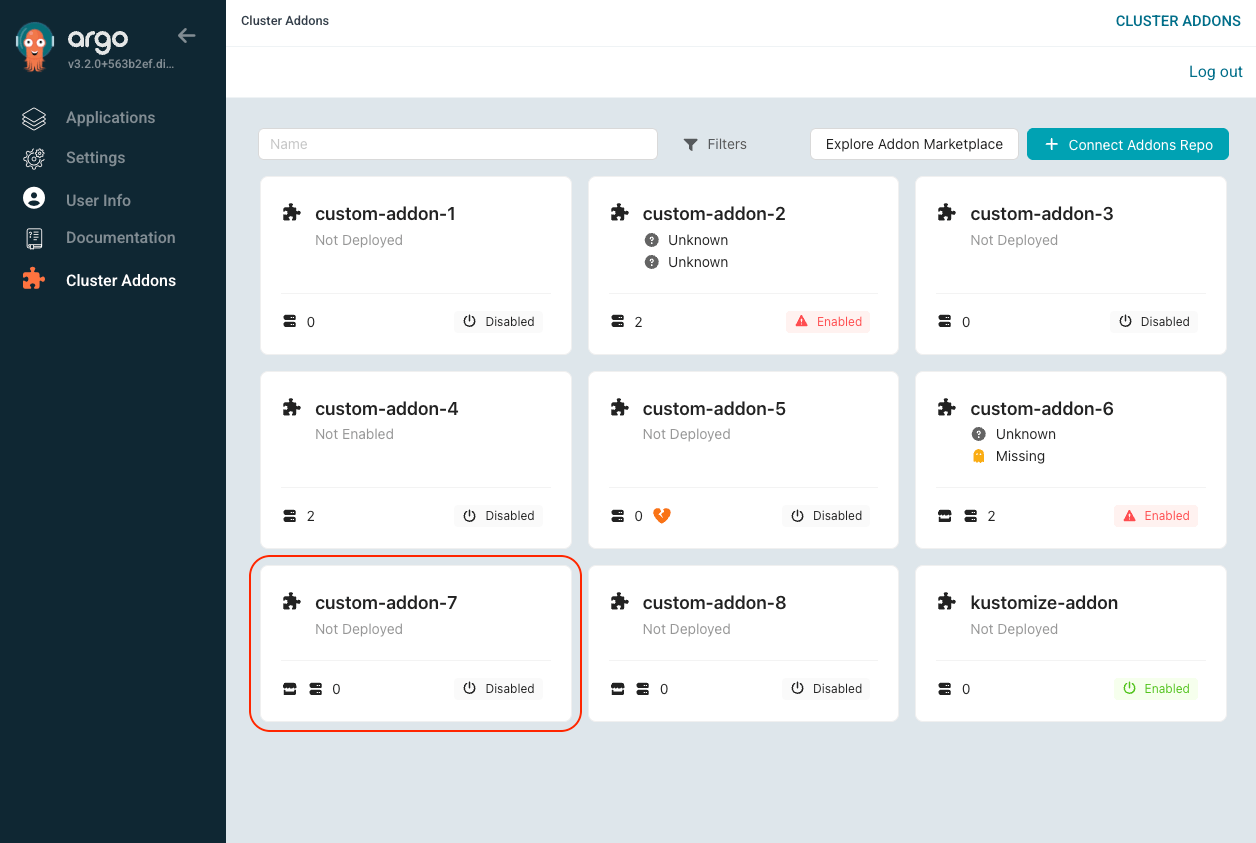
In your deployed ArgoCD instance go to Cluster Addons section, and click on the addon you wish to configure.
-
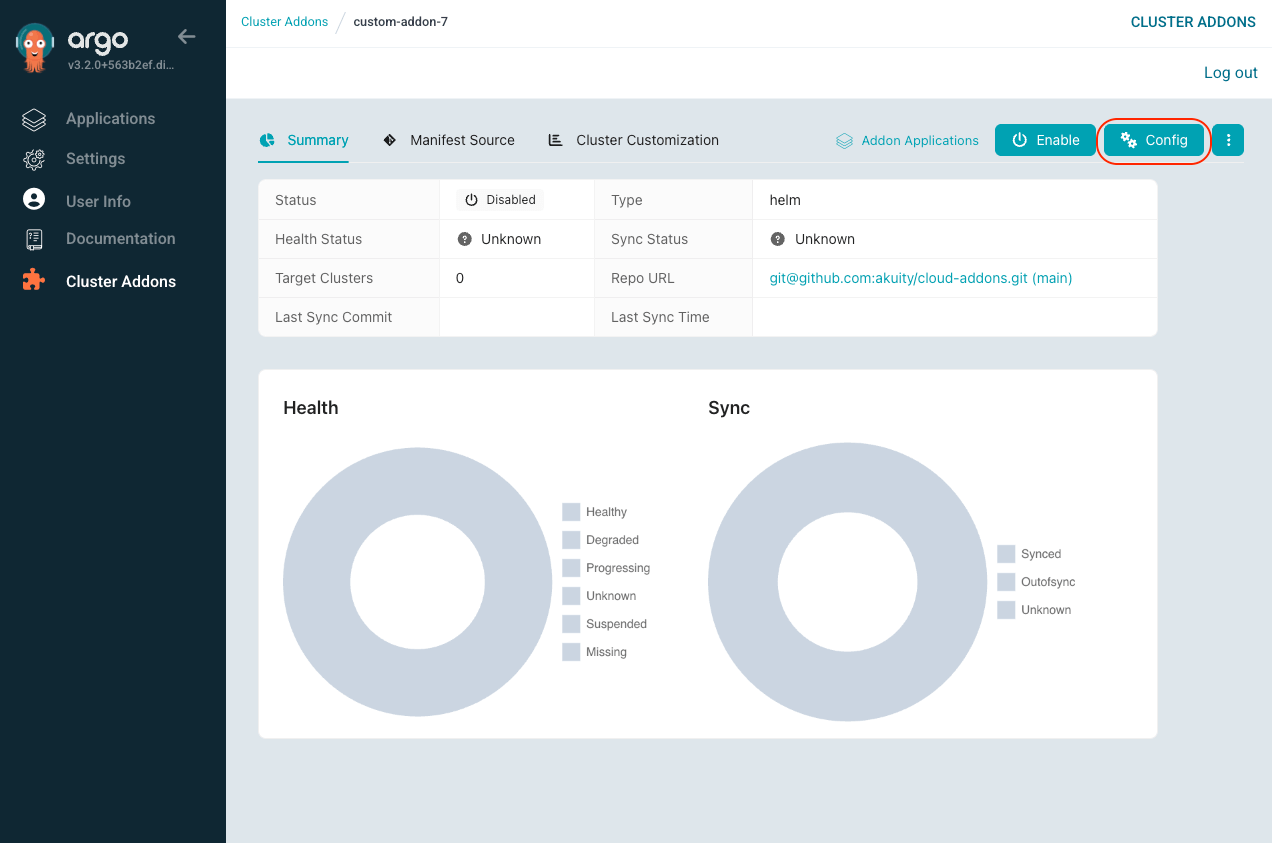
In the addon details view, click the Config button.
-
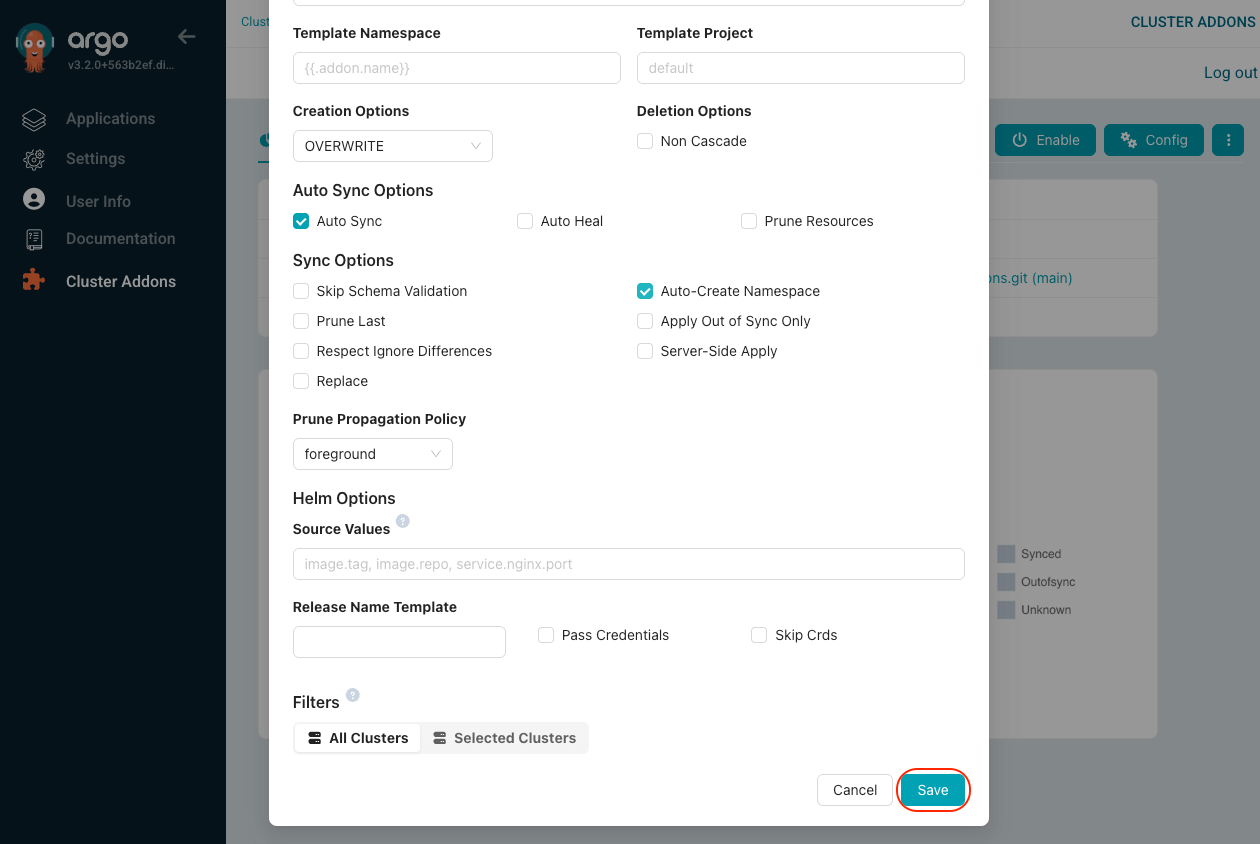
Configure the addon options:
- Template Name: The templated name of the addon.
- Template Namespace: The templated namespace where the addon will be deployed.
- Template Project: The templated project where the addon will be deployed.
Template SyntaxYou can use the following allowed template expressions to dynamically configure your addon:
- Addon Fields:
{{ .addon.name }}— The name of the addon.{{ .addon.type }}— The type of the addon (e.g., "helm", "kustomize").- Cluster Fields:
{{ .cluster.name }}— The cluster's name.{{ .cluster.namespace }}— The cluster's namespace.{{ .cluster.labels }}— The cluster's labels (use{{ .cluster.labels.key }}to access specific labels).{{ .cluster.annotations }}— The cluster's annotations:- Use
{{ .cluster.annotations.key }}to access specific annotations - Use
{{ .cluster.annotations["example.com/xyz"] }}for keys with dots/slashes
- Use
- Note: Array values cannot be accessed by index. The entire array must be set as a value.
-
Creation Options: Configure the creation details for the addon.
-
Auto Sync Options:
- Auto Sync: Enable automatic synchronization of the addon.
- Auto Heal: Enable automatic healing of the addon.
- Prune Resources: Enable automatic pruning of resources.
-
Sync Options:
- Skip Schema Validation: Skip schema validation.
- Auto-Create Namespace: Automatically create the namespace if it does not exist.
- Prune Last: Prune the last remaining resources.
- Apply Out of Sync Only: Apply changes only when the addon is out of sync.
- Respect Ignore Differences: Respect the ignore differences configuration.
- Server-Side Apply: Use Kubernetes Server-Side Apply.
- Replace: Replace existing resources during sync.
-
Prune Propagation Policy: Set the prune propagation policy.
-
Deployment Options: Configure the addon deployment details based on its type:
-
Helm Options:
-
Source Values: Specify YAML paths to extract specific values from your Helm values file. These paths define which configuration values will be managed by the addon system. For example:
# Example YAML paths to extract specific values:
image.tag
replicaCount
ingress.host
resources.limits.memory
The system will extract these values from your values.yaml file and allow you to override them per cluster or environment through Manifest Source updates.
-
Release Name Template: Define the release name template for Helm releases. This is useful for distinguishing between the same addon deployed to different clusters:
# Examples:
{{ .addon.name }}-{{ .cluster.name }}
{{ .cluster.name }}-{{ .addon.type }}
{{ .cluster.annotations["example.com/xyz"] }}-{{ .addon.name }}  # For keys with dots/slashes
-
-
Kustomize Options:
-
Name Prefix Template: Define the name prefix template for Kustomize resources. This helps avoid naming conflicts across clusters:
# Examples:
{{ .cluster.name }}-{{ .addon.name }}
{{ .addon.name }}-{{ .cluster.labels.environment }} -
Name Suffix Template: Define the name suffix template for Kustomize resources:
# Examples:
{{ .addon.name }}-{{ .cluster.name }}
{{ .addon.name }}-{{ .cluster.labels.region }}
-
-
-
Filters: Control which clusters receive the addon:
- All Clusters: Deploy the addon to all connected clusters.
- Selected Clusters: Deploy the addon to selected clusters based on name and label filters.
-
Click Save to store the configuration.
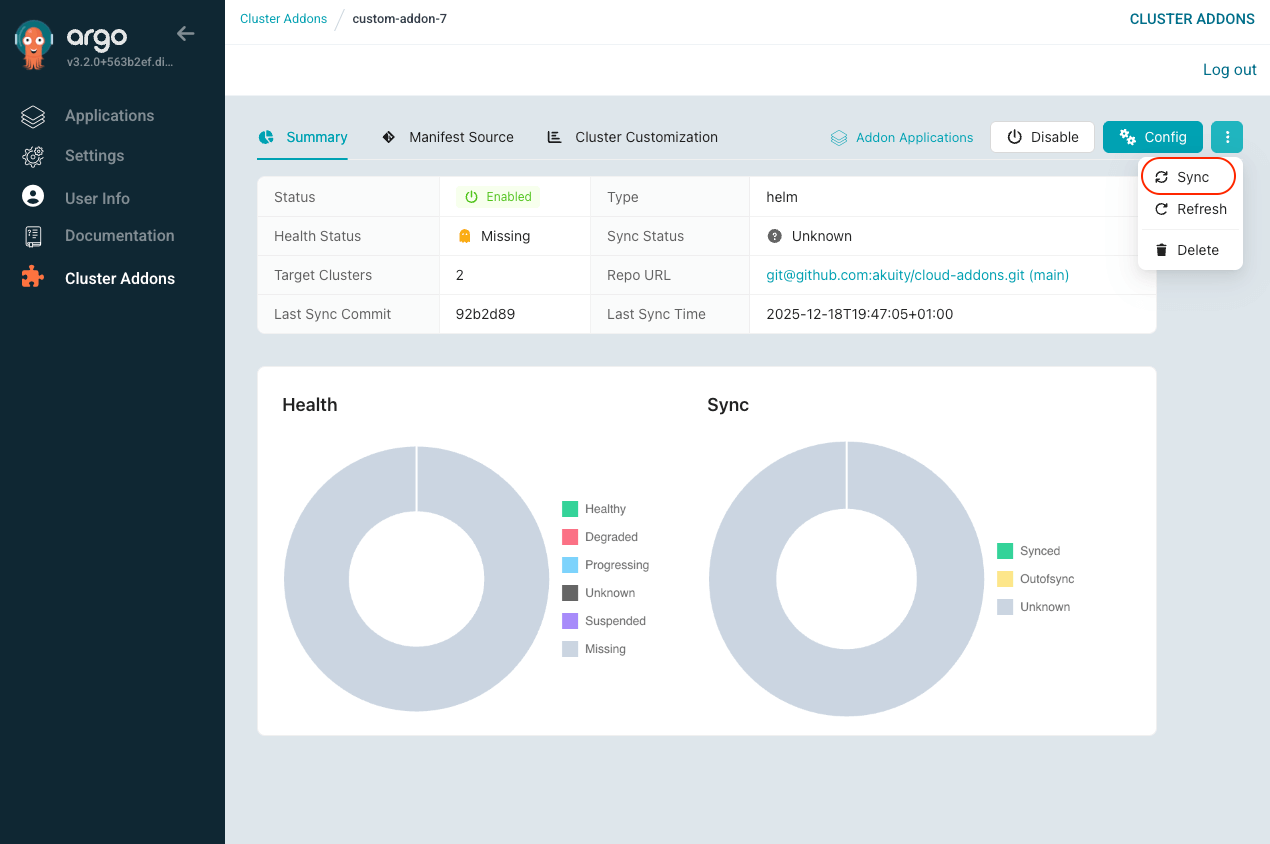
Step 2: Enable/Deploy Addon
After configuring the addon, enable (deploy) it in your cluster by following these steps:
-
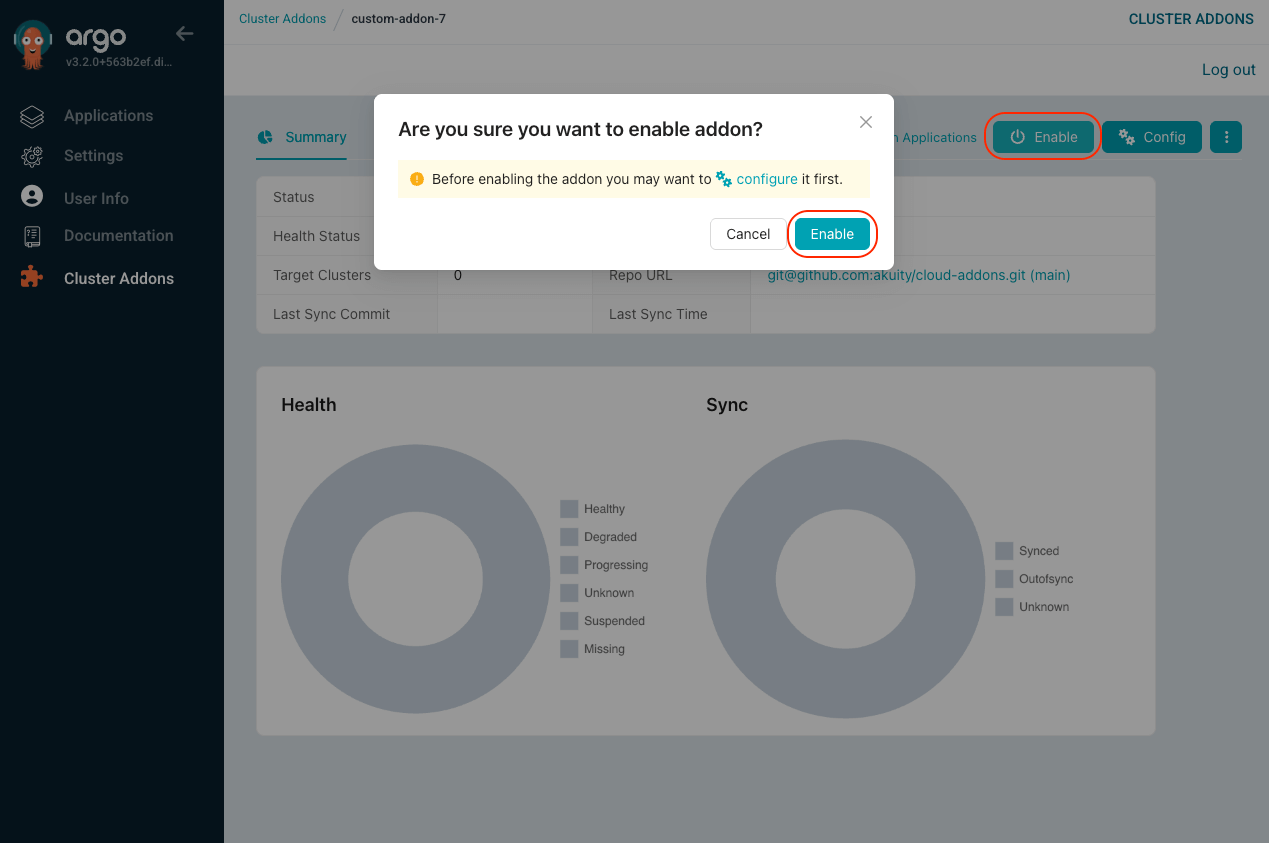
In the Cluster Addons extension, select the addon you wish to enable.
-
In the addon details view, click the Enable button. Confirm the action by clicking Enable in the confirmation dialog.
-
Navigate to the Summary tab for your addon. Here, you can view the current sync status. If auto-sync is not enabled, click the Sync button to synchronize the addon with your cluster.
-
The addon will now be deployed in your cluster.
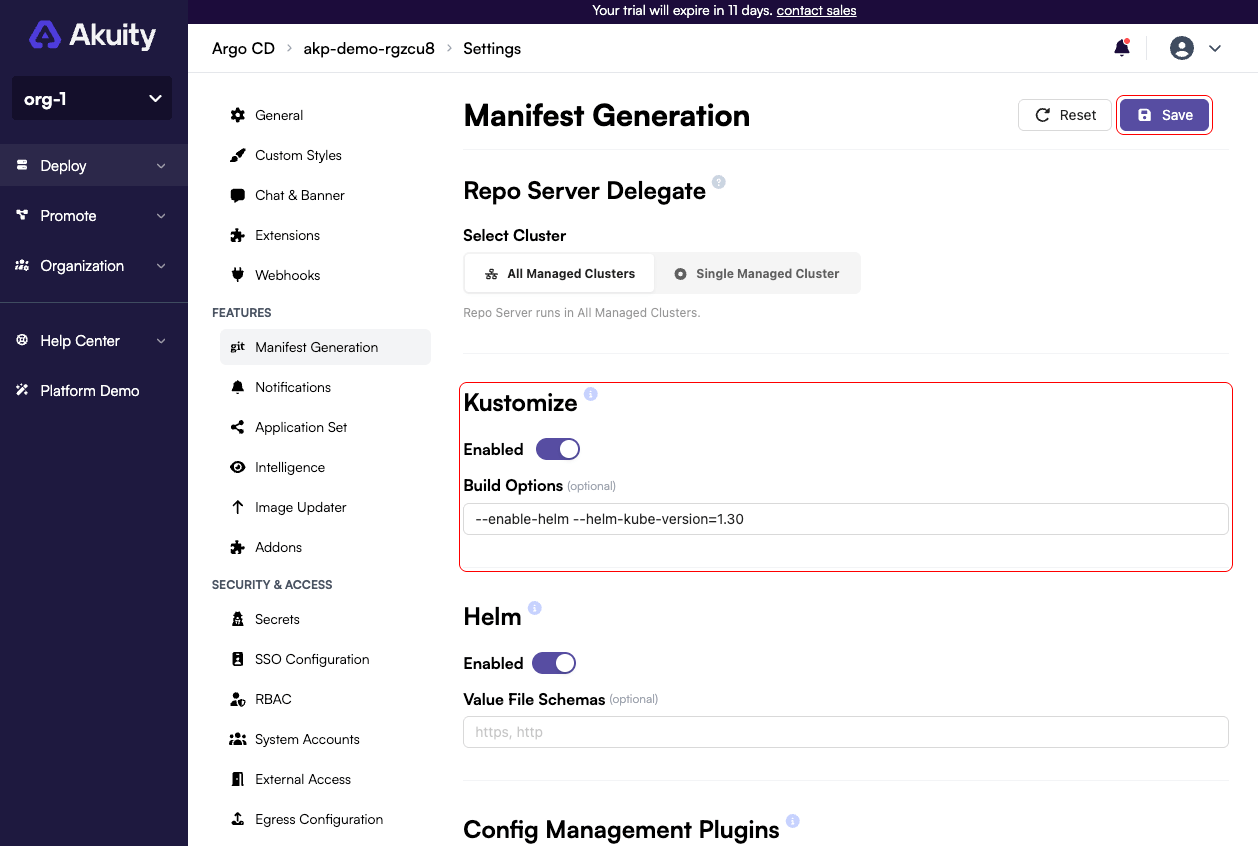
To use Kustomize for incorporating Helm charts in your addons, enable Kustomize in your ArgoCD instance settings as follows:
-
Open your instance settings and click on the Manifest Generation tab.
-
In the Kustomize section, enable the Enabled option and add the following build options:
--enable-helm --helm-kube-version=1.30 -
Click Save to apply the settings.
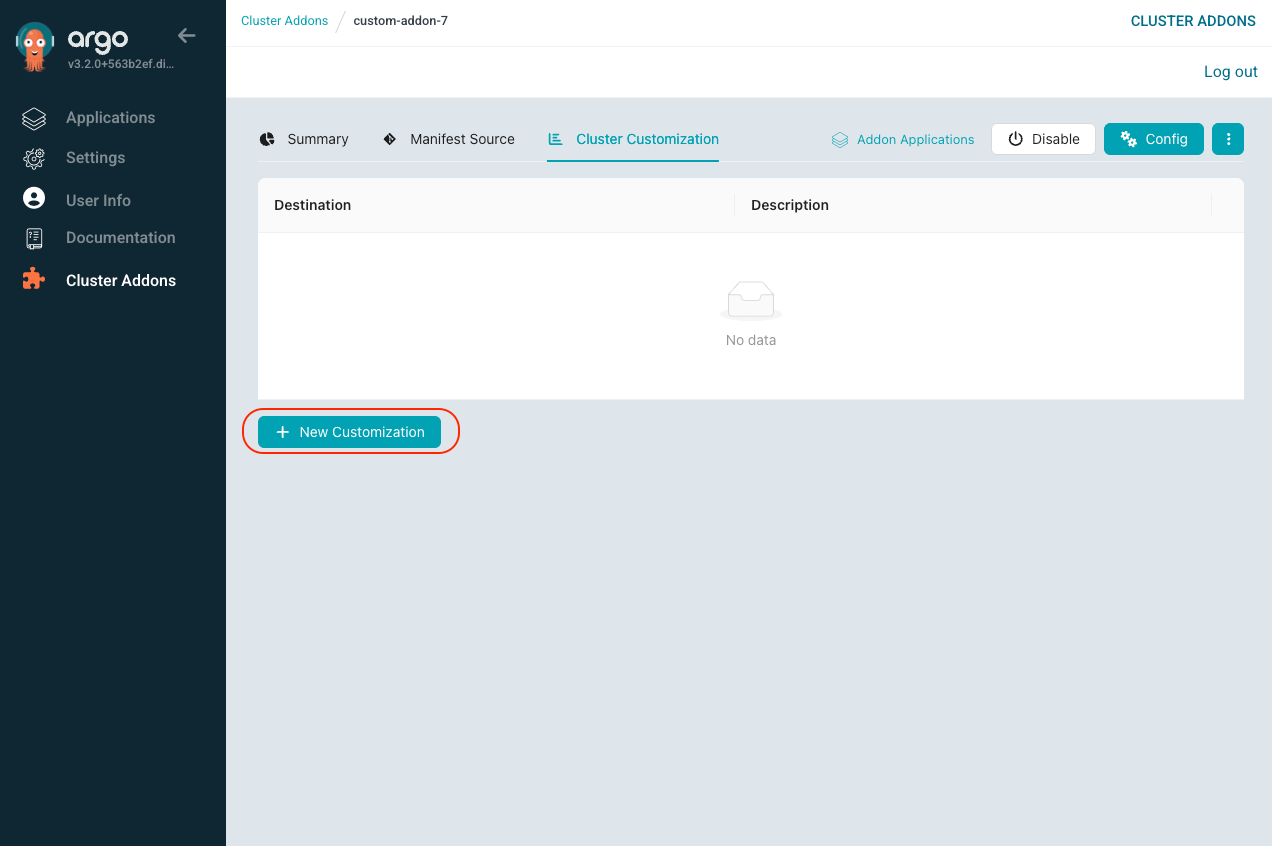
Cluster Customization
You can patch the application spec of an addon to make cluster-specific changes. To patch the application spec, follow these steps:
-
In the Cluster Addons extension on your deployed Argo CD instance, select the addon you wish to patch.
-
Go to the Cluster Customization tab.
-
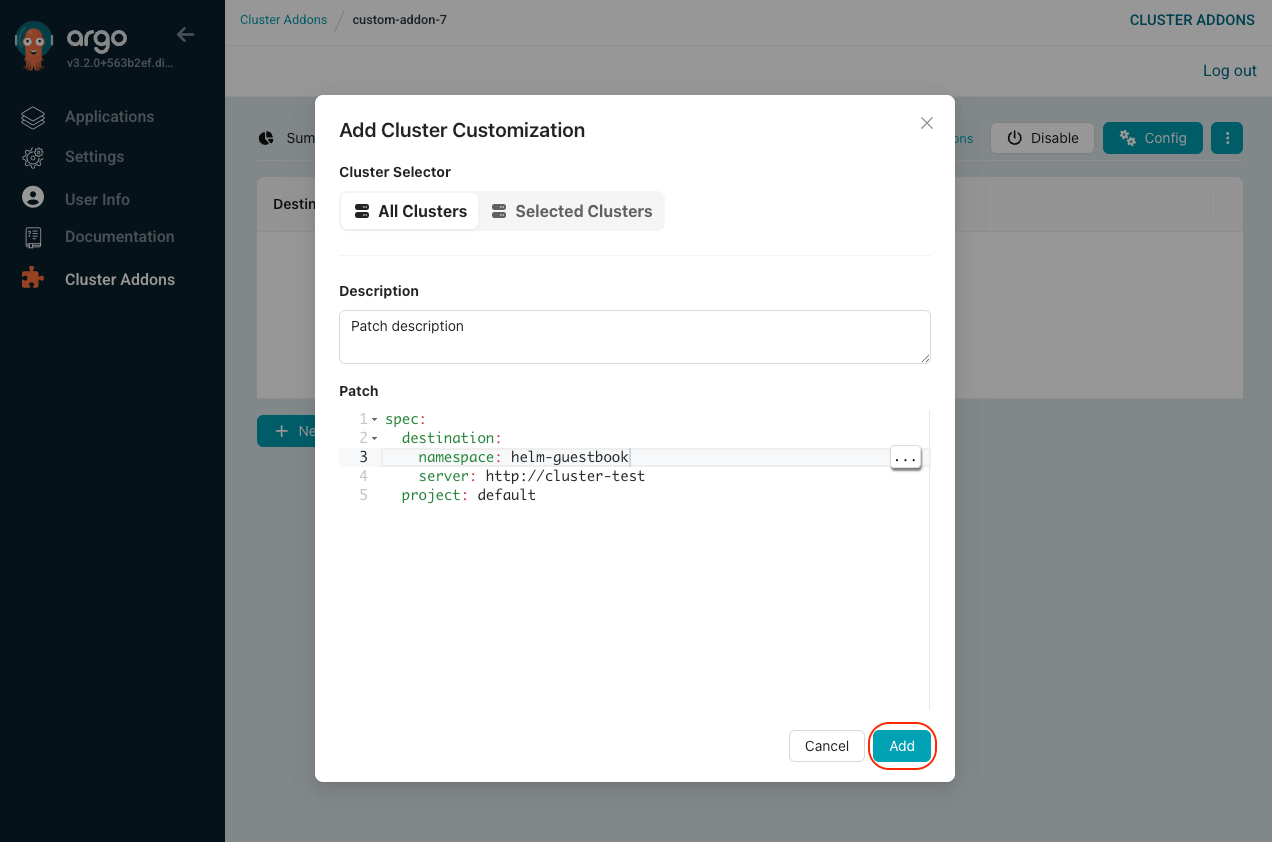
Click on the New Customization button to add a new patch.
-
Select the target cluster, enter the patch details, and click Add to apply the patch.
Update Manifest Source
You can update the manifest source for an addon to implement environment or cluster-specific changes. This is where you can override the base configuration defined in the Deployment Options for specific clusters or environments.
The Source Values (YAML paths) configured in Deployment Options define which configuration values from your Helm values file will be managed by the addon system. The Manifest Source updates allow you to override these specific values for different clusters or environments, providing fine-grained control over your addon deployments.
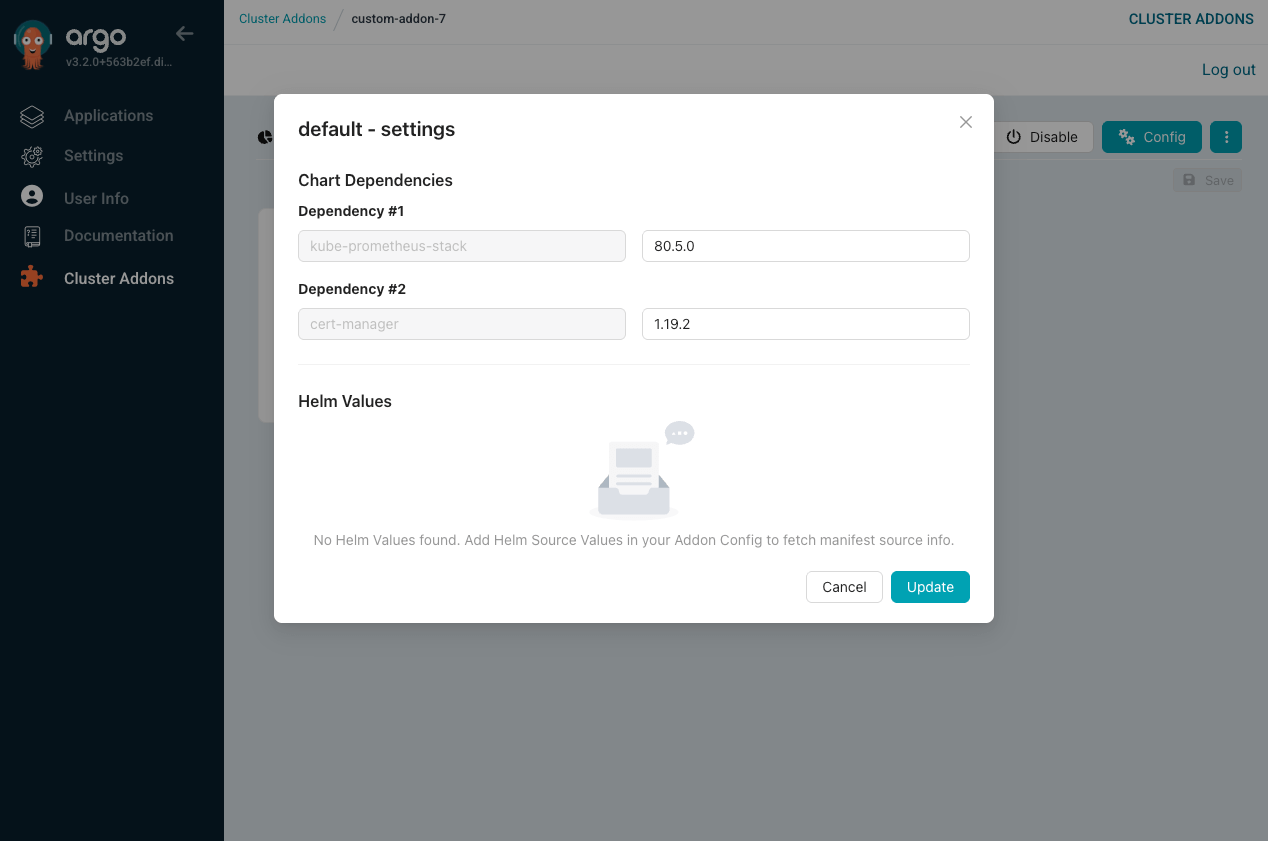
Helm Addon Manifest Source Updates
For Helm addons, you can update:
-
Values Override: Override specific values that were defined as YAML paths in the Source Values configuration. The system will update your values.yaml file with these overrides.
-
Chart Dependencies: Update chart dependency versions.
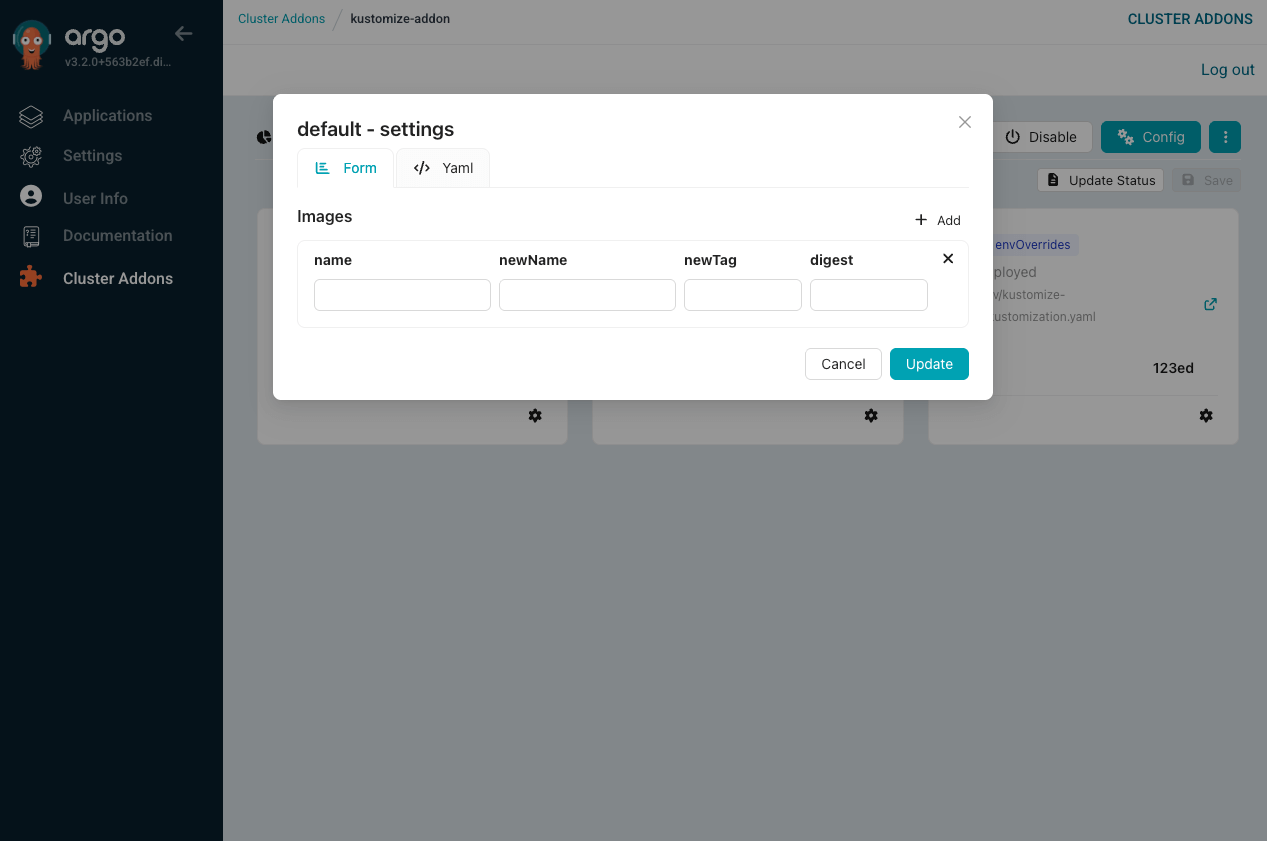
Kustomize Addon Manifest Source Updates
For Kustomize addons, you can update:
-
Images: Update container image configurations including name, new name, tag, and digest.
-
Helm Charts: Update Helm chart dependencies used by Kustomize.
How to Update Manifest Source
To update the manifest source, follow these steps:
-
Go to Cluster Addons section on your deployed Argo CD instance.
-
Select the addon you want to update and enter its details.
-
Navigate to the Manifest Source tab.
-
Click on the Settings icon next to the manifest source you wish to update.
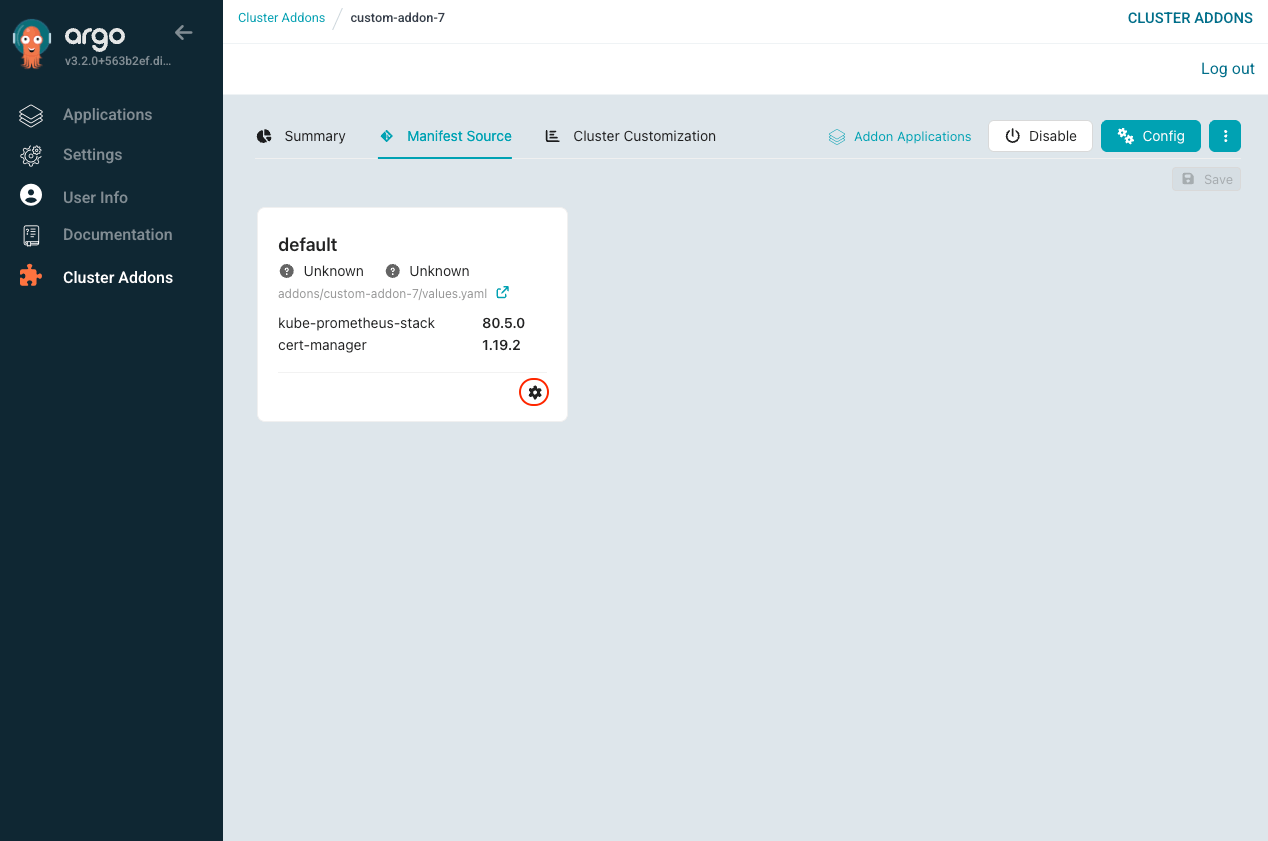
-
Update the configuration based on your addon type:
- For Helm: Update values and chart dependencies
- For Kustomize: Update images and Helm chart dependencies
-
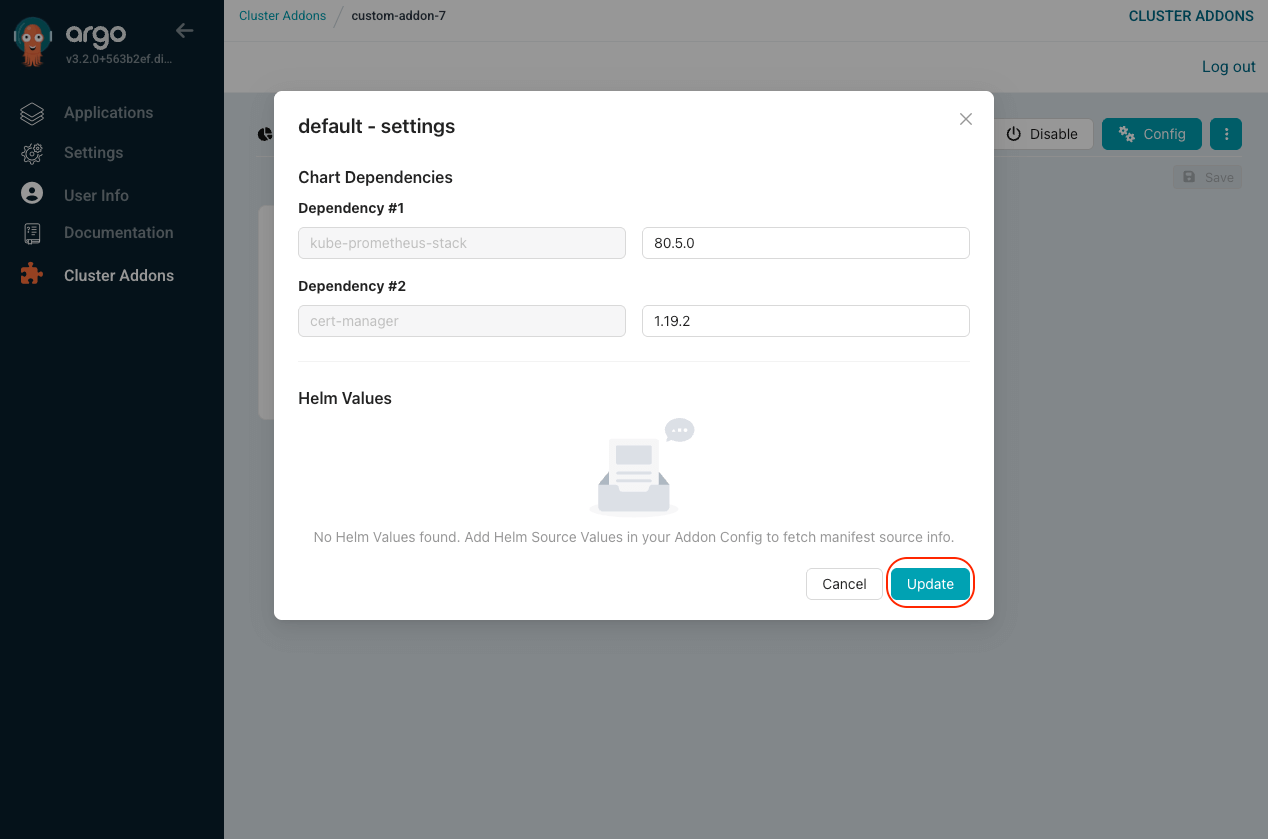
Click Update to apply the changes.
In this way, you can deploy and manage addons in your cluster using Argo CD. In the next section, we will cover how to delete addons from the cluster.