Introduction to Argo CD for FinTech
This tutorial will walk you through building container images with GitHub Actions, and then implementing Argo CD with the Akuity Platform, to manage the deployment of the container to Kubernetes using Helm charts and GitOps.
Ultimately, you will have a Kubernetes cluster, with Applications deployed using an Argo CD control plane.
- 1. Prerequisites
- 2. Setting up Your Environment
- 3. Building a Container Image with GitHub Actions
- 4. Using Argo CD to Deploy Helm Charts
- 5. Managing Argo CD Applications Declaratively
- 6. Tool Detection, and Sync Waves
- 7. Review
1. Prerequisites
To follow this tutorial make sure you have minimal working knowledge of the following concepts:
The tutorial requires that you also have a GitHub Account. You will use this to:
- host a public repo for the GitOps configuration.
- utilize GitHub Codespaces for the workshop environment. Ensure that you have a quota available. The free tier includes 4 vCPU at 30 hours a month.
- create an account on the Akuity Platform.
The tutorial was written and tested using the following tool and component versions:
- Argo CD: v2.10.1
- Docker Desktop: 4.13.1
- Kubernertes: v1.29.1
- k3s: v5.6.3
2. Setting up Your Environment
2.1. Create the Repository from a Template
In this scenario, you will utilize GitHub to host the Git repo containing the Kubernetes manifests and building a container image. To represent this in the workshop, you will create a repository from a template.
-
Click this link or click "Use this template" from the
akuity/intro-argo-cd-tutorial-templaterepo main page. -
Ensure the desired "Owner" is selected (e.g., your account and not an organization).
-
Enter
intro-argo-cdfor the "Repository name". -
Then click
Create repository from template . -
Next, you'll start a new Codespace by clicking the green
Code button on the repo page, selecting theCodespaces tab, and then selectingCreate codespace on main .
The Codespace will open in another browser tab with information about setting up your codespace. Once it's done setting up, you should see a terminal in the browser with the repo open.
2.1.1. Verify Environment
Part of the codespace setup was to install all necessary tools, which includes setting up k3d and kubectl. You can verify that the environment is ready by going through the following:
-
Verify that
k3dis installed and running a Kubernetes cluster.k3d cluster listYou should see the following output:
NAME SERVERS AGENTS LOADBALANCERdev 1/1 0/0 true -
Check that the cluster works by running
kubectl get nodes.% kubectl get nodesNAME STATUS ROLES AGE VERSIONdev-control-plane Ready control-plane 7m44s v1.29.2Fetching the nodes will demonstrate that
kubectlcan connect to the cluster and query the API server. The node should be in the "Ready" status.
2.2. Akuity Platform Sign Up
This scenario demonstrates deploying applications to a cluster external to Argo CD.
Similar to how the GitHub repo is hosting the Helm charts, which describe what resources to deploy into Kubernetes, the Akuity Platform will host the Application manifests, which represent how to deploy the resources into the cluster. Along with Argo CD, which will implement the changes on the cluster.
Sign up for a free 30-day trial of the Akuity Platform!
-
Create an account on the Akuity Platform.
-
To log in with GitHub SSO, click "Continue with GitHub".
You can also use Google SSO or an email and password combo.
- Click
Authorize akuityio .
-
Click the
create or join link. -
Click
+ New organization in the upper right hand corner of the dashboard. -
Name your organization following the rules listed below the
Organization Name field.
2.3. Setup Access for the akuity CLI
-
Select the Organization you want to create a key for, from the pull down menu.
-
Switch to the
API Keys tab. -
Click
+ New Key button on the lower right side of the page. -
Set the
Description for the key toworkshop. -
Assign the
OwnerRole to the key. -
Click the
Create button. -
Click the
Copy to Clipboard button, then paste and run the commands in the Codespace terminal.
2.4. Create your Argo CD Instance
You can create your Argo CD instance using the Akuity Platform Dashboard or CLI by choosing between the tabs below.
- CLI
- Dashboard
-
Set your organization name in the
akuityconfigakuity config set --organization-id=$(akuity org list | awk 'NR==2 {print $1}')infoThis command uses some bash-fu, so let's break that down:
$(akuity org list | awk 'NR==2 {print $1}'): This part of the command is a sub-command enclosed in$(), which means it will be executed first, and its output will be used as the value for the--organization-idparameter.akuity org list: This command lists all organizations in your Akuity Platform account. In this case, there should only be one.|: The pipe symbol takes the output of the previous command (the list of organizations) and passes it as input to the next command.awk 'NR==2 {print $1}':awkis a text processing tool. This specific awk command is used to extract the first field ($1) from the second line (NR==2) of the input provided by theakuity org listcommand. -
Create the Argo CD instance on the Akuity Platform
akuity argocd apply -f akuity-platform/ -
Wait for the instance to become healthy, then apply the agent install manifests to the cluster.
akuity argocd cluster get-agent-manifests --instance-name=argo-cd dev | kubectl apply -f - -
From the Akuity Platform Dashboard, in the top, next to the Argo CD instance name and status, click the instance URL (e.g.,
<instance-id>.cd.akuity.cloud) to open the Argo CD login page in a new tab. -
Enter the username
adminand the passwordakuity-argocd.
You now have a fully-managed Argo CD instance 🎉
-
Navigate to
Argo CD . -
Click
+ Create in the upper right hand corner of the dashboard. -
Name your instance following the rules listed below the
Instance Name field. -
(Optionally) Choose the Argo CD version you want to use.
-
Click
+ Create .
At this point, your Argo CD instance will begin initializing. The start-up typically takes under 2 minutes.
2.4.1. Configure Your Instance
While the instance is initializing, you can prepare it for the rest of the lab.
-
In the dashboard for the Argo CD instance, click
Settings . -
On the inner sidebar, under "Security & Access", click
System Accounts . -
Enable the "Admin Account" by clicking the toggle and clicking
Confirm on the prompt. -
Then, for the
adminuser, clickSet Password . -
Click
Regenerate Password , then clickCopy . -
In the bottom right of the Set password prompt, hit
Close . -
In the top, next to the Argo CD instance name and status, click the instance URL (e.g.,
<instance-id>.cd.akuity.cloud) to open the Argo CD login page in a new tab. -
Enter the username
adminand the password copied previously.
You now have a fully-managed Argo CD instance 🎉
2.5. Deploy an Agent to the Cluster
You must connect the cluster to Argo CD to deploy the application resources. The Akuity Platform uses an agent-based architecture for connecting external clusters. So, you will provision an agent and deploy it to the cluster.
-
Back on the Akuity Platform, in the top left of the dashboard for the Argo CD instance, click
Clusters . -
In the top right, click
Connect a cluster . -
Enter the
devname as the "Cluster Name". -
In the bottom right, click
Connect Cluster . -
To get the agent install command, click
Copy to Clipboard . Then, in the bottom right,Done . -
Open your terminal and check that your target is the correct cluster by running
kubectl config current-context.If you are following along using
k3d, you should see the following:% kubectl config current-contextk3d-dev -
Paste and run the command against the cluster. The command will create the
akuitynamespace and deploy the resources for the Akuity Agent. -
Check the pods in the
akuitynamespace. Wait for theRunningstatus on all pods (approx. 1 minute).% kubectl get pods -n akuityNAME READY STATUS RESTARTS AGEakuity-agent-<replicaset-id>-<pod-id> 1/1 Running 0 65sakuity-agent-<replicaset-id>-<pod-id> 1/1 Running 0 65sargocd-application-controller-<replicaset-id>-<pod-id> 2/2 Running 0 65sargocd-notifications-controller-<replicaset-id>-<pod-id> 1/1 Running 0 65sargocd-redis-<replicaset-id>-<pod-id> 1/1 Running 0 65sargocd-repo-server-<replicaset-id>-<pod-id> 1/1 Running 0 64sargocd-repo-server-<replicaset-id>-<pod-id> 1/1 Running 0 64sRe-run the
kubectl get pods -n akuitycommand to check for updates on the pod statuses. -
Back on the Clusters dashboard, confirm that the cluster shows a green heart before the name, indicating a healthy status.
3. Building a Container Image with GitHub Actions
Creating Your Container Image
The goal of continuous delivery is to react to new releases (versions) of applications and deploy them to the desired location. For the sake of this workshop, you'll use a simplified example of building a container image, which you will later deploy to Kubernetes following GitOps principles with Argo CD.
The repository that you cloned contains a Dockerfile at the root. The file itself is rather simple, it takes an existing container image as the base and builds a new container from it. The Dockerfile is purely illustrative, representing what would normally be a more complex set of instructions that generate an image based on source files. In the context of the workshop, the Dockerfile is used to build custom container images for deployment into your Kubernetes cluster.
FROM quay.io/akuity/argo-cd-learning-assets/guestbook:latest
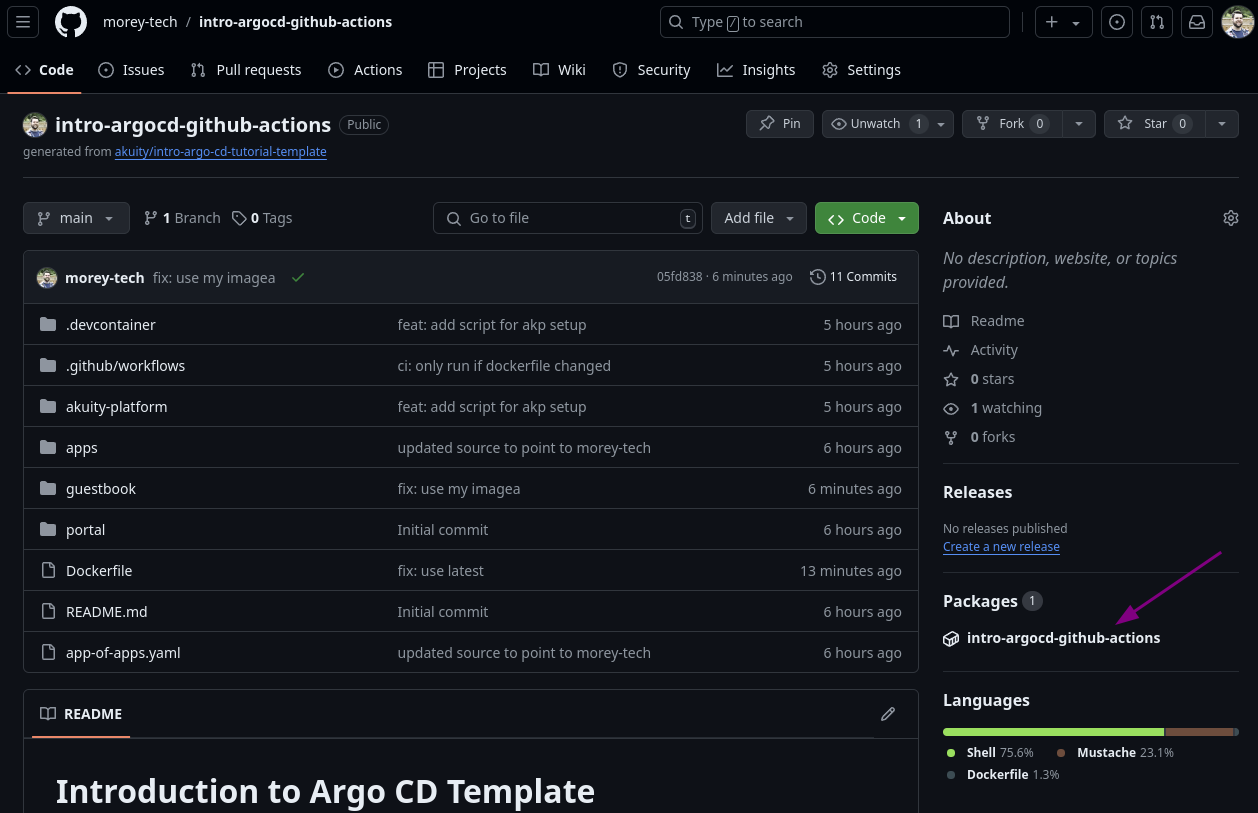
The .github/workflows folder contains a workflow file build.yaml used to build an image based on the Dockerfile and push it to the GitHub Container Registry (GHCR) associated with the repository. The workflow is configured to push a new image for each change that includes the Dockerfile, tagging it with latest and the first 7 characters of the commit SHA (e.g. fe68a20).
Using Your Container Image
To take advantage of the container image built by GitHub Actions after modifying the Dockerfile, you must update the Helm chart to reference it.
-
Navigate to the
guestbook/values.yamlfile in your repository. -
In a separate tab, open the package (container image in GHCR) associated with your repo.
-
Copy the container image repo address and paste it into the
image.repositoryvalue for the Helm chart.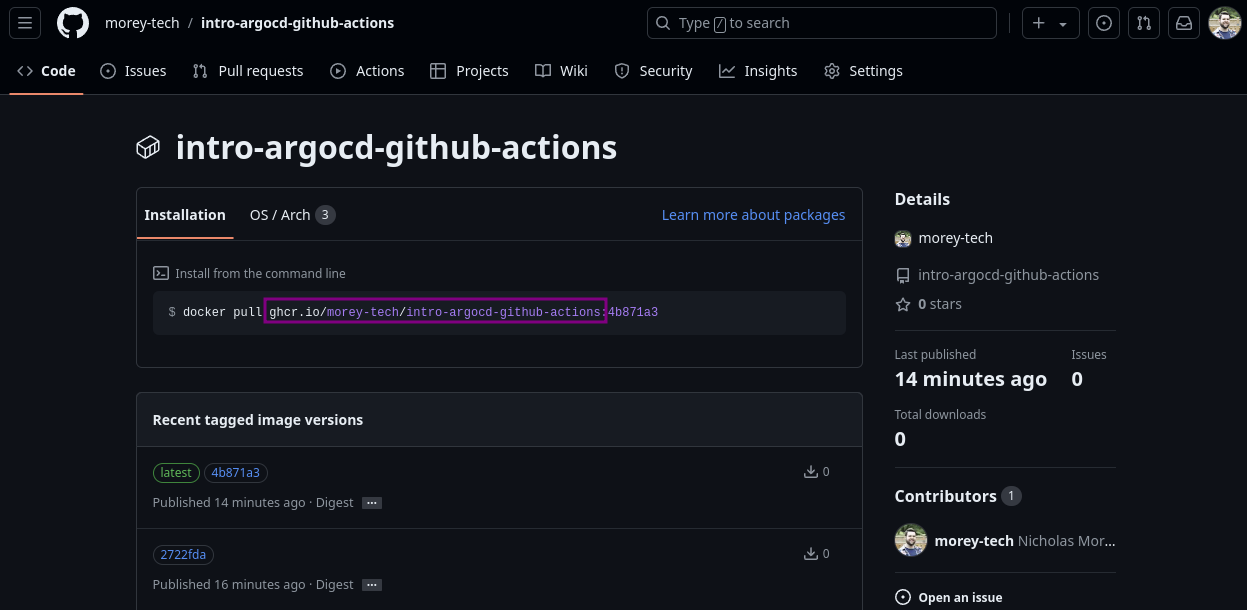
-
Commit and push the change to the repo.
4. Using Argo CD to Deploy Helm Charts
4.1. Create an Application in Argo CD
Now, using an Application, you will declaratively tell Argo CD how to deploy the Helm charts.
Start by creating an Application to deploy the guestbook Helm Chart from the repo.
- Dashboard
-
Navigate to the Argo CD UI, and click
NEW APP . -
In the top right, click
EDIT AS YAML . -
Paste the contents of
apps/guestbook-dev.yamlfrom your repo.
This manifest describes an Application.
- The name of the Application is
guestbook-dev. - The source is your repo with the Helm charts.
- The destination is the cluster connected by the agent.
- The sync policy will automatically create the namespace.
-
Click
SAVE . At this point, the UI has translated the Application manifest into the corresponding fields in the wizard. -
In the top left, click
CREATE . The new app pane will close and show the card for the Application you created. The status on the card will show "Missing" and "OutOfSync". -
Click on the Application card titled
argocd/guestbook-dev.
In this state, the Application resource tree shows the manifests generated from the source repo URL and path defined. You can click
- In the top bar, click
SYNC thenSYNCHRONIZE to instruct Argo CD to create the resources defined by the Application.
The resource tree will expand as the Deployment creates a ReplicaSet that makes a pod, and the Service creates an Endpoint and EndpointSlice. The Application will remain in the "Progressing" state until the pod for the deployment is running.
Afterwards, all the top-level resources (i.e., those rendered from the Application source) in the tree will show a green checkmark, indicating that they are synced (i.e., present in the cluster).
4.2. Syncing Changes Manually
Trigger a new container build
To trigger the build of the container image and push to your GHCR, modify the tag in the FROM statement in the Dockerfile from latest to 0.1.0 then commit and push the change.
-- FROM quay.io/akuity/argo-cd-learning-assets/guestbook:latest
++ FROM quay.io/akuity/argo-cd-learning-assets/guestbook:0.1.0
Pushing the commit with the change will trigger the build GitHub Actions workflow on your repository, generating the package (container image) in your GHCR.
Using the container image
An Application now manages the deployment of the guestbook Helm chart. So what happens when you want to deploy a new image tag?
Instead of running helm upgrade guestbook-dev ./guestbook, you will trigger a sync of the Application.
-
Navigate to your repo on GitHub, and open the file
guestbook/values-dev.yaml. -
In the top right of the file, click the pencil icon to edit.
-
Override the default
image.tagvalue by setting it to the newest tag on your package.image:tag: <commit-sha> -
Click
Commit changes... . -
Add a commit message. For example
chore(guestbook): bump dev tag. -
Click
Commit changes . -
Switch to the Argo CD UI and go to the
argocd/guestbook-devApplication. -
In the top right, click the
REFRESH button to trigger Argo CD to check for any changes to the Application source and resources.noteThe default sync interval is 3 minutes. Any changes made in Git may not apply for up to 3 minutes.
-
In the top bar, click
SYNC thenSYNCHRONIZE to instruct Argo CD to deploy the changes.
Due to the change in the repo, Argo CD will detect that the Application is out-of-sync. It will template the Helm chart (i.e., helm template) and patch the guestbook-dev deployment with the new image tag, triggering a rolling update.
4.3. Enable Auto-sync and Self-heal for the Guestbook Application
Now that you are using an Application to describe how to deploy the Helm chart into the cluster, you can configure the sync policy to automatically apply changes — removing the need for developers to manually trigger a deployment for changes that already made it through the approval processes.
-
In the top menu, click
DETAILS . -
Under the
SYNC POLICY section, clickENABLE AUTO-SYNC and on the prompt, clickOK . -
Below that, on the right of "SELF HEAL", click
ENABLE . -
In the top right of the DETAILS pane, click the
X to close it.
If the Application was out-of-sync, this would immediately trigger a sync. In this case, your Application is already in sync, so Argo CD made no changes.
4.4. Demonstrate Application Auto-sync via Git
With auto-sync enabled on the guestbook-dev Application, changes made to the main branch in the repo will be applied automatically to the cluster. You will demonstrate this by updating the number of replicas for the guestbook-dev deployment.
-
Navigate to your repo on Github, and open the file
guestbook/values.yaml. -
In the top right of the file, click the pencil icon to edit.
-
Update the
replicaCountto the2list. -
In the top right, click
Commit changes... . -
Add a commit message. For example
chore(guestbook): scale to 2 replicas. -
In the bottom left, click
Commit changes . -
Switch to the Argo CD UI and go to the
argocd/guestbook-devApplication. -
In the top right, click the
REFRESH button to trigger Argo CD to check for any changes to the Application source and resources.
You can view the details of the sync operation by, in the top menu, clicking
5. Managing Argo CD Applications Declaratively
5.1. Create an App of Apps
One of the benefits of using Argo CD is that you are now codifying the deployment process for the Helm charts in the Application spec.
Earlier in the lab, you created the guestbook-dev Application imperatively, using the UI. Do you want to manage the Application manifests declaratively too? This is where the App of Apps pattern comes in.
Argo CD can take plain Kubernetes manifests from a directory and deploy them. The Application manifests are Kubernetes resources, just like a Deployment. Therefore, an Application pointing to a folder in Git containing Application manifests will work the same as the guestbook-dev Application from earlier. With the caveat that for Argo CD application controller to pick up Applications, they must be created in the argocd namespace.
-
Navigate to the Applications dashboard in the Argo CD UI, and click
NEW APP . -
In the top right, click
EDIT AS YAML . -
Paste the contents of
app-of-apps.yaml(in the repo's root).apiVersion: argoproj.io/v1alpha1kind: Applicationmetadata:name: bootstrapnamespace: argocdspec:destination:name: in-clusterproject: defaultsource:path: appsrepoURL: https://github.com/<repo>targetRevision: HEADThis Application will watch the
apps/directory in your repo which contains Application manifests for theguestbook-stgandguestbook-prodinstances of theguestbookchart, and a newportalHelm chart. -
Click
SAVE . -
Then, in the top left, click
CREATE . -
Click on the Application card titled
argocd/bootstrap.At this point, the Application will be out-of-sync. The diff will show the addition of the
argocd.argoproj.io/tracking-idlabel to the existingguestbook-devApplication, which indicates that the "App of Apps now manages it".kind: Applicationmetadata:++ annotations:++ argocd.argoproj.io/tracking-id: 'bootstrap:argoproj.io/Application:argocd/guestbook-dev'generation: 44labels:...path: guestbookrepoURL: 'https://github.com/<username>/intro-argo-cd-tutorial'syncPolicy:automated: {}Along with a new Application for the
portalHelm chart. -
To apply the changes, in the top bar, click
SYNC thenSYNCHRONIZE .
From this Application, you can see all of the other Applications managed by it in the resource tree. Each child Application resource has a link to its view on the resource card.
6. Tool Detection, and Sync Waves
After creating the App-of-Apps it deployed the portal Application based on the manifest in Git (apps/portal.yaml). Since the automated sync policy is not enabled, it remains out-of-sync. We'll go through some explanation before triggering the sync.
- Click on the Application card titled
argocd/portal.
6.1. Tool Detection
The portal Application utilizes Kustomize via the kustomization.yaml file in the portal folder. Unlike the guestbook-dev Application, the portal does not specify Kustomize in the source spec. Instead, it relies on Argo CD's automatic tool detection. If a config management tool is not specified in the source of an Application, Argo CD will check for the following:
- A
chart.yamlfile in the folder. If found, it will assume that the folder contains a Helm chart. - A
kustomization.yamlfile in the folder. If found, Argo CD will use Kustomize.
If neither is found, Argo CD will default to plain Kubernetes manifests.
Since the portal folder contains the manifests.yaml, Argo CD knows to use Kubernetes manifests.
6.2. Sync Phases, Waves, & Hooks
Each time Argo CD performs a sync on an Application, it does not simply generate the manifests and apply them to the cluster. Each sync contains multiple phases and waves. It may also create Kubernetes Job resources known as hooks. The portal Application is an example of this functionality.
The portal folder contains a frontend and backend Deployment with corresponding Services, and 3 Jobs. Yet the resources shown in the out-of-sync Application don't contain those Jobs. This is because the Jobs contain the argocd.argoproj.io/hook annotation which indicates to Argo CD that the resource should applied during a sync. Typically hooks are Jobs or (Argo) Workflows, but can be any resource.
In the portal Application, hooks are used to update the SQL schema for the backend, and bring up and down a maintenance page for the frontend. The schema update Job, runs in the PreSync phase which happens before the Sync phase when resources are applied. Therefore, before updating the image for the backend Deployment, the schema can be updated in preparation.
The frontend Deployment and related resource hooks rely on sync waves to ensure they are executed in the correct order. Each phase in a sync can contain multiple sync waves. The default sync wave, which all resources that don't specify the argocd.argoproj.io/sync-wave fall on, is 0. Sync waves can be negative, so a wave of -1 will run before all resources on the default wave.
The hook to bring up the maintenance page for the frontend runs on sync wave 1. The frontend Deployment and Service are on wave 2. Then the hook to bring down the maintenance page is on wave 3. This order of waves ensures that the maintenance page is brought up first. While it's up, the changes are made to the frontend resources. Then once their sync is complete, the page is brought back down.
6.3. Sync It!
With an understanding of how the portal Application sync works, go ahead and trigger a sync and watch as the resources are created in a precisely choreographed fashion, rather than all at once.
- In the top bar, click
SYNC thenSYNCHRONIZE .
7. Review
You have reached the end of the tutorial. You have an Argo CD instance deploying Helm charts from your repo into your cluster.
You no longer manually deploy Helm chart changes. The Application spec describes the process for deploying the Helm charts declaratively. There's no longer a need for direct access to the cluster, removing the primary source of configuration drift.